To set the record straight, I am not really a padded pelmet sort of a person. However it seemed to be a good fix as a window dressing in our guest bedroom. There is a functional, good quality wooden blind on the window left by the previous owner so it seemed crazy to get rid of that and spend a heap of money/time making something else. Enter the padded pelmet! There are loads of "how to's" out there which I used for guidance, I found Jenny's at the Little Green Notebook the most helpful. I want to show you how I made mine as it is slightly different, and I think a better method (sorry Jenny!).
Materials required
- foam core board
- wooden batting - I used 1"x1" and got the helpful chap at Home Depot to cut it to the desired length
- gaffer tape (love a project that uses gaffer tape)
- fabric
- quilters batting
- x4 L shaped brackets
- Drill
- Stanley knife
First off you need to decided on the dimensions of your pelmet, it depends on the window size. Mine is 7 inches tall & 5 inches deep (ie. the sides are 5"x7"). As I said I got the wood cut to size at Home Depot so then just had to cut the foam board to size. If you have ever used this stuff before you will know what a pain it is to cut. I found the best method is three strikes for each cut, if you see what I mean. First cut goes through outer layer, second middle foam layer & last cut through the bottom board. Once you have cut your pieces gaffer tape the thing together.
I then attached the wooden batting using the staple gun and gaffer tape (for luck). Attach 2 of the L shaped brackets in the corners and add on your side panels.
Now move in from the garage! Once you have cut the fabric and batting to size (don't worry if their is a join in the batting, it won't notice, but I would try to use a continuous piece of fabric) lay them out together on the floor. Start by stapling the fabric & batting to the inside edge of the wooden rod. I started in the middle of the pelmet and worked towards the corners. When you get to the corners fold it round like wrapping a present. I'm not gonna lie, it was a bit of a bodge!
Along the bottom I double folded the fabric to give a neat edge and also enough bulk so the staples wouldn't show through on the front of the pelmet.
Attaching it to the wall required a little more thought, and the services of Mr Maker. Essentially we attached the other L shaped brackets to the wood & then into the wall.
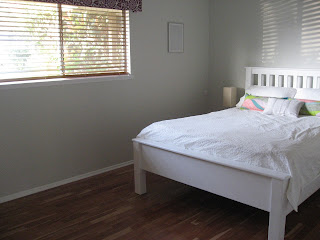
What do you think? I might just be converted to the way of the padded pelmet!


 Also another thrifted find was the embroidery hoops, $6 bucks for the three. The girls and I loved going through my fabric stash to find the right fabric to go in them. I like the thought that I can change the fabric when the mood takes me. The idea is all over Pinterest (what idea isn't?!).
  Other elements of the room - pictures are prints from the Guggenheim Museum in Bilbao, Spain, chair from my mother in law (I think!), bedlinen & cushions from Ikea. I am on the hunt for a picture to go above the bed...