Friday, December 9, 2011

Thrifty find

I bought this wooden cupboard months ago for 14 bucks from Goodwill and have finally got round to finishing it.  I fell out of love with it over the months, as you do when projects kick about for ages.  I am happy to report we are right back there after I finished it off & filled it with my daughter's favourite trinkets (OK my favourites of her trinkets).


Managed to get the maps in another project. That atlas for a dollar from a yard sale was a dollar well spent.


Tuesday, December 6, 2011

Christmas cards

Agghhh mail merge! Why do you taunt me so with your simple sounding instructions? Yet give me 1 1/2 addresses on each label?  More the fool am I for trying to go high tech and print my address labels this year.....Anyway, the battle was won (after many tedious hours and failed attempts), we have labels stuck on envelopes. Thank you to my eldest daughter who helped with the sticking.  The US mail man will be saved my lazy scrawl.

I am rather pleased with this years Christmas cards. They've got maps on them, what's not to like?  


I am blogging around the Christmas tree with the best of them and have posted a link to my cards with The 36th Avenue.  There are some other fantastic cards. Inspiration for next year!


Sunday, December 4, 2011

Its beginning to feel a lot like Christmas

It is official, the build up to Christmas has started in our house, and I'm excited! My list of pre Christmas jobs is still being stored "up stairs" but will soon need to be converted to paper to ensure I don't forget anything.


We made Christmas stones the other afternoon (can you guess which ones the girls did?). It was a great way to spend a cold and windy afternoon and really got us into the mood.  They are currently serving as a table runner decoration.


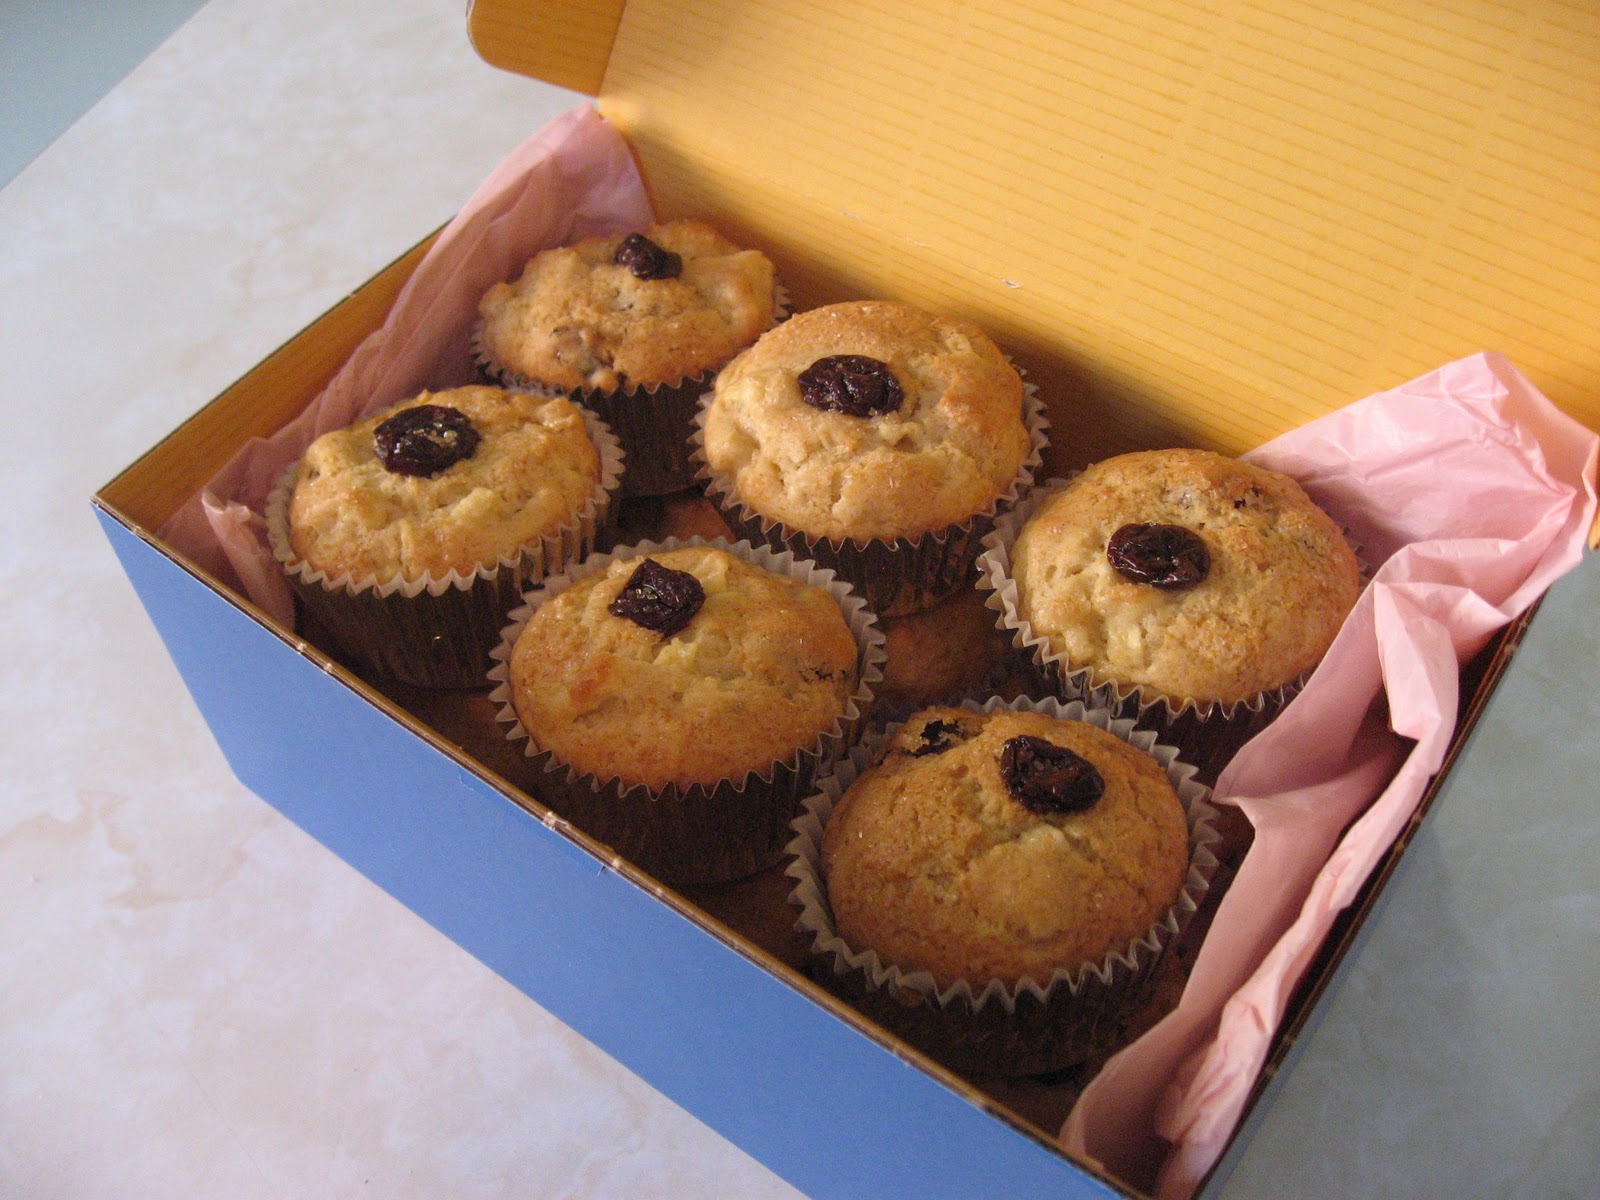
These muffins were a house warming gift as the flavours seemed appropriately seasonal.  You could even swap the dried cherries for dried cranberries to up the Christmasiness.  I think I will be making them again over the next few weeks, maybe even for Christmas morning?


Spiced apple & dried cherry muffins
175g of apple peeled and finely chopped (the original recipe calls for a bramley, but any variety will do)
75g dried cherries
75g golden sugar
1 large egg, beaten
150ml milk
75ml oil
250g self raising flour
1 tsp baking powder
generous sprinkle of mixed spice (at least 2 tsp)
pinch of salt
demerara sugar to sprinkle on top

Heat oven to 375F (190C).  Add peeled & chopped apple to bowl with all but 12 of the cherries, golden sugar, egg, milk & oil. Mix together.  Sift in flour, mixed spice, baking powder & salt.  Fold the ingredients together ensure all the flour is mixed in but try to keep it light.  Divide into 12 muffin cases then top with a cherry & a sprinkle of demerara sugar.  Bake for 25mins until golden. Turn out onto wire rack.

I think this is the earliest we have ever got a tree, fingers crossed it hasn't dropped all of its pesky needles by the 25th....I love getting out the tree decorations, its like seeing old friends again, some of them perky and pleased to be on show, others a little tired and a bit droopy.  Our tree is super sized in comparison to our UK version, I think we need to get some more decorations, what do you think?

Right then, enough blogging on with the "real" jobs - making mince pies & the Christmas cards.




Monday, November 21, 2011

A children's bag

The request for Hello Kitty tatt for my god daughter's Christmas present was easy to for fill - that Kitty is everywhere.  I wanted to make a little bag for her to store her HK treasures in. I found this fab HK fabric online but as I only needed 1/2 yard I couldn't really justify the delivery cost.  So I opted for some cheery prints from the local Joann's, only $4.99 a yard. The bag is now multi-functional, not just for Hello Kitty treasures.


I followed the tutorial for the Lindie Bag from Craft Apple and it has turned out extremely well.  This bag gave me an opportunity to expand my sewing repertoire;

  • First proper use of fusible interfacing
  • First following of a pattern to the letter AND it working
  • First attempt at boxed corners
And I am very happy to report all were successful firsts, yay!


Friday, November 11, 2011

QR code

Having made the Tooth Fairy pillows I thought I should attach a label to get my name out there, and possibly get my readership into double figures (I can but try).  
Linda at Craftaholicsanonymous posted how to make a QR code which she put on her business cards.  Doubtful I'll ever be at the business card stage but wanted something simple for my tag.  My husband was mildly impressed I even knew what a QR code was! The website is super easy to use and its free to generate your own QR code.  The tags, ribbon & brass safety pins were from Joann's and labels (which I cut to size) were from Office Depot.


I think the tag is a work in progress, but for first round attempt not bad.  Lets see if it generates any traffic...

Tooth Fairy pillow x10

The Tooth Fairy pillow was well received by my soft toy loving nephew.  My sister, who isn't crafty (I can put that as she doesn't read my blog!), was also impressed. So much so that she order x10 for my nephew's school Christmas Craft Fair.  I rather enjoyed the repetition of making more than one of something and the simplistic nature of the task. That tells you something about me doesn't it?!


I have my second order, 2 more for my cousin's kids.  This could turn into a "thing"...

Wednesday, November 9, 2011

Tea & Cake

I invited some friends round the other weekend for tea and cake because I wanted an excuse to bake. Not of course that you need one...  This is the best sponge cake recipe ever.  Its the one I use for all birthday cakes.  The chocolate icing recipe is from Queen Delia.


Sponge Cake


250g softened unsalted butter
2 tsp vanilla essence
1 1/2 cups of caster sugar
4 eggs 
3 cups self raising flour
1 cup milk


Heat oven to 325F. Grease & line your chosen tin.
Beat butter, vanilla 7 sugar in a bowl until pale & fluffy. The longer the better, at least 5 mins.  Beat in the eggs.  Start off by adding a teaspoon full at a time, gradually adding in a little more each time until combined.  Stir in flour & milk in batches.  Go easy on the milk, sometimes I don't feel the mixture needs all of it. Spread mixture into tin & bake in the oven until the cake has turned a golden colour and a skewer comes out clean.  The time will depend on the type of tin/pan used and your oven.  Usually approx. 30mins. Cool in the tin for 5 mins or so then turn out onto a wire rack.


Chocolate fudge icing


75g granulated sugar
75ml evaporated milk
110g semi sweet chocolate (ie. plain dark)
40g butter
vanilla essence


Stir sugar & evaporated milk in a pan over a low heat until the sugar has dissolved. When all the granules have dissolved bring the mixture to the boil & simmer for 6 mins without stirring.
Take the pan off the heat & stir in the chocolate then butter and drops of vanilla essence.  Allow to cool slightly before icing the cake. It will thicken as it cools.


The above quantities made, filled & iced the cake below, sorry not sure of dimensions (can't be bothered to dig out tin and measure!). Guestimate - 8" inch cake.
I used Smarties & purple sugar to decorate.

Johnny, the play school pet sampling the cake!