Showing posts with label sewing. Show all posts

Friday, September 25, 2015

Cafetiere cosy

I had a few girlfriends round for coffee on Monday so the Daddy cafetiere was deployed but as we were busy chatting our coffee was busy cooling. Yuck to luke warm coffee.  I rather un-stylishly wrapped a tea towel round the pot and made a note to get on with making a cosy for the cafetiere.

I found this great tutorial on Stumbles & Stitches blog and essentially followed her ideas.

First up you need to measure you cafetiere to determine the size of the cosy.  Measure the diameter of your cafetiere - 1", then the height from bottom of spout to base of cafetiere + 1".  This will give you the larger of the two rectangles, mine was 13 1/2" x 6 1/2".  The second smaller rectangle will make up the fastener that goes between the handle. So measure the height between the handle & use a standard length of 5".  My smaller rectangle was 5" x 4".

I chose to use scraps for the outside of the cosy as I have a bazillion and I love this particular fabric (Kokka Echino London fabric) as its a great colour and a slightly heavy weight linen which is suitable for this project.


Sew the scraps together to the required size then press the seams open.  Trim to the size of the larger rectangle.  Lay this over a piece of quilt batting (or fleece) and join the two by stitching either side of the seams.

Pin before stitching batting to outside fabric
Next attach a piece of Velcro to the fabric on the outside of the cosy about 1/2" in from the edge & in the middle.


Pin the batting layer to your second fabric which will be on the inside of the cosy, right sides together. Sew together leaving a gap for the smaller rectangle to fit in. This will be the opposite end to the Velcro end.

Stitch the smaller rectangle together as you did the larger one (with out the quilting stage).  


Poke the smaller rectangle into the larger one and stitch all the way round the larger one to attach it and finish the cosy.
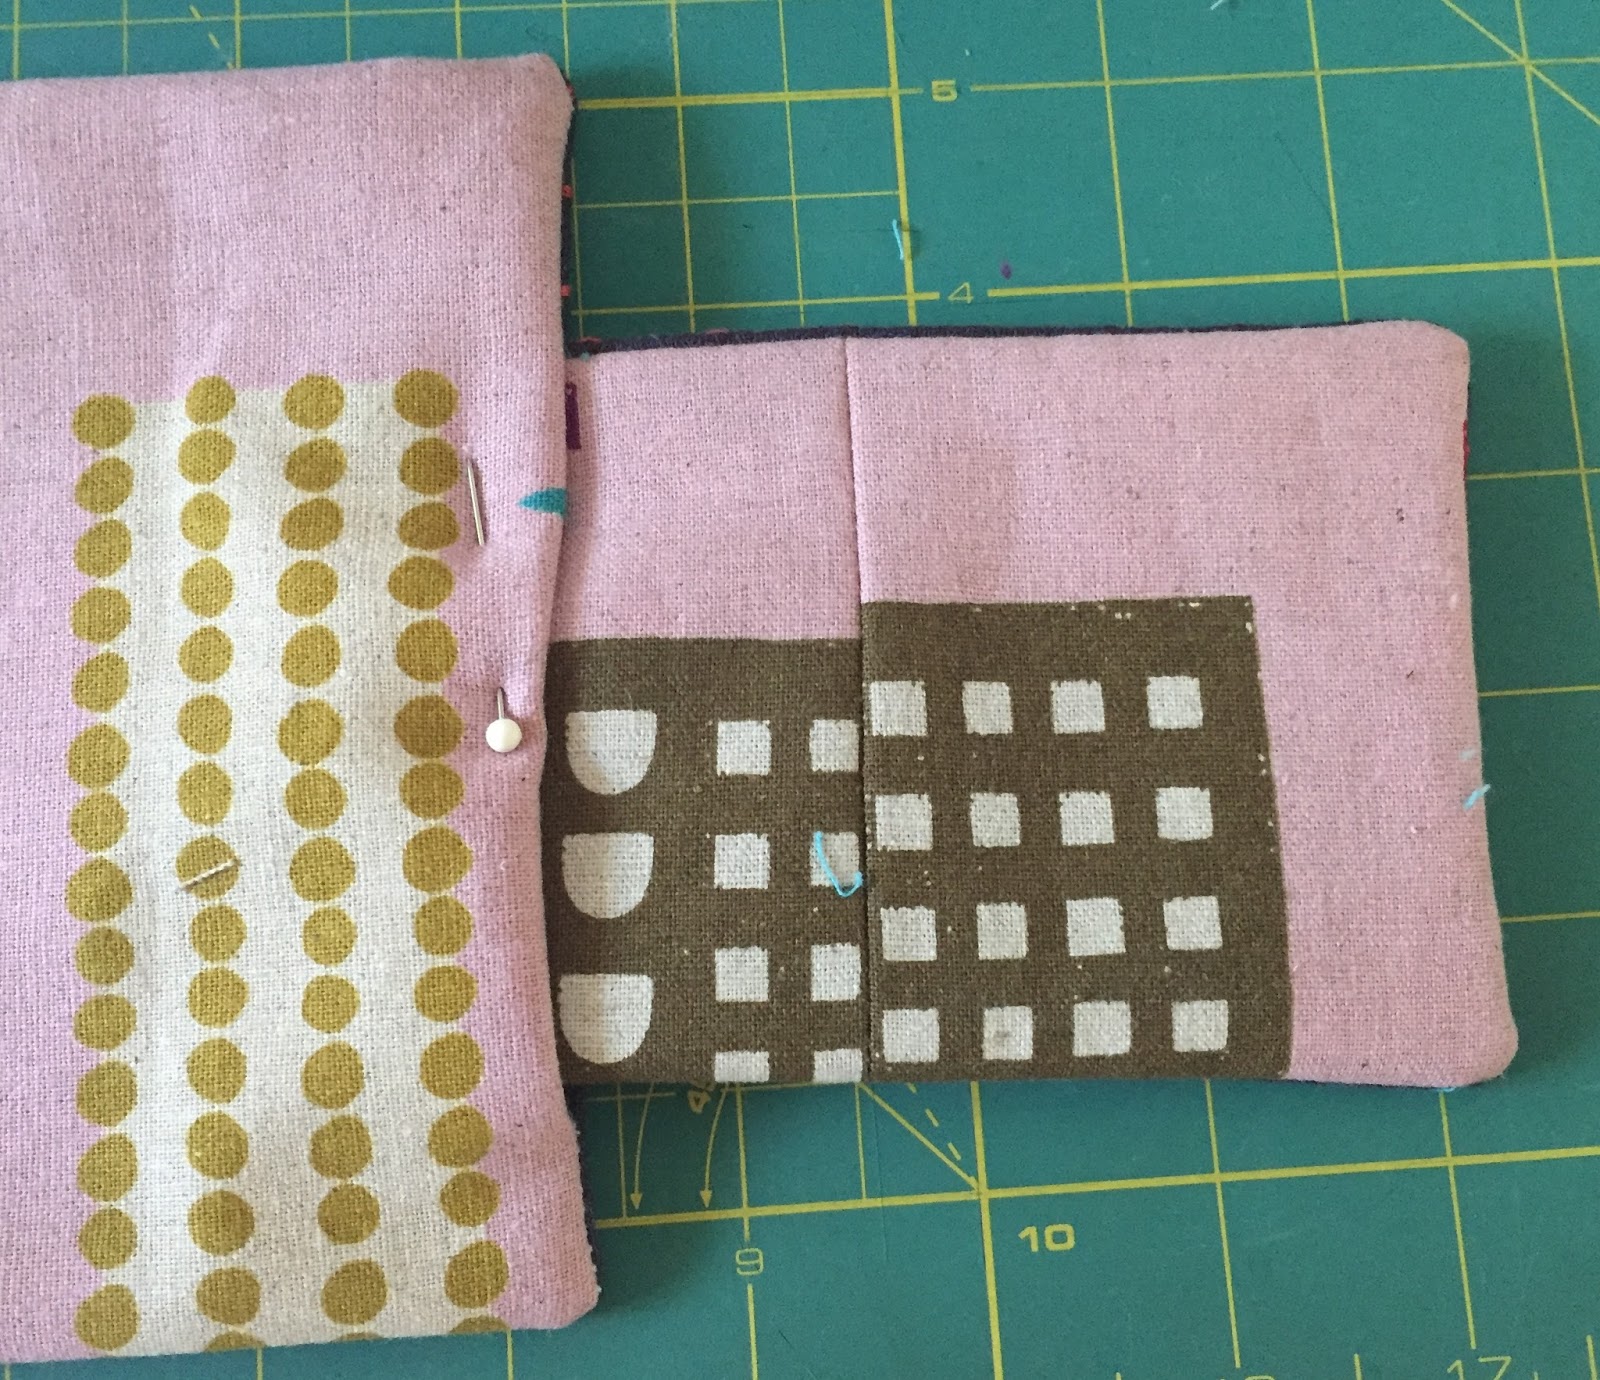

 You are done! One finished cafetiere cosy!


 Such an easy and fun project, I'm thinking of knocking a few up for Christmas gifts.

Saturday, June 13, 2015

Anna inspired costume

The Frozen frenzy died down a while ago for my girls (isn't it about time Frozen 2 came out?!) but I think it is still very much alive amongst the younger ones. If our recent trip to Disneyland and the number of kids in Elsa costumes is anything to go by.  

My goddaughter was a little late to the Frozen party, in fact to the whole movie watching thing, so she is still very much a rampant fan.  I decided to make her an Anna costume for her birthday (Thanks Rob for the inspiration!). The sewing element is very simple and the techniques could be applied for any number of princesses, if you are that way inclined.


The skirt is a basic circle skirt with elastic sewed directly into the waistband.  Circle skirts are so easy to do and give the desired swirlyness. The cape is then the same principle except you then cut the circle of fabric to give the opening and instead of attaching a waist band you attach a hood.  I chose fleece for the cape which doesn't require any hemming, bonus!


To make the bodice I used one of my daughters vest tops as a template to cut out the basic design. Then created a velcro fastening at the back for ease of on/off.  

Cape detail
The great thing about making dress up costumes is you don't need to be too hung up on perfection; just make sure your seams are good and strong as these outfits can get ripped on and off at lightening speed several hundred times a day!


I am pleased to report the outfit was well received - "Best present EVER!" was mentioned! 


Thursday, January 16, 2014

Embroidery for babies

Perhaps the title is a little misleading. I don't actually mean embroidery for babies but embroidery for babies. Get it?

One of my best friends at home (UK) had twins before Christmas; a boy & girl.  I've been rather slow getting round to making them a gift what with Christmas, sickness (yup we had the lurgy for Christmas too) and a family ski trip all happening straight after their arrival into the world. Anyhow that's my excuse....


Nicola (of a Pip and a Peach fame) introduced me to embroidery. She gave me this pattern last year when she came to visit; the fruits of which now hang in my youngest daughter's bedroom. I thought I could utilise the same pattern for the twins as it had a boy & girl version.

Embroidery is a great sewing skill to add to your repertoire.  Its gratifyingly easy and you get results fast.  There are many super cute designs out there, Etsy is a great source in case you are looking.  There are many ways to get the image onto the fabric, this YouTube video explains them well.  I just traced mine through the fabric.


Did I forget to do her legs???!

I added a back to these two as they are a gift. Gather in the edges of the fabric by pulling together with a running stitch then secure with a knot. I then hot glued the backing fabric to the other fabric.  You could also sew the two pieces of fabric together.


Welcome little babies :-) xx


Friday, July 5, 2013

Double duty Ikea hack

Double duty table - Ikea hack
The DIY train is rolling again. I am moving my sewing 'stuff' from the sitting room into the spare bedroom. The room is used when we have visitors from the UK (more often than not with our large family!) which adds up to a few months a year.  It seemed logical to give the room another function. 

I wanted a table that could sit at the end of the bed and be useful for guests then modified to become a sewing table and/or desk when life returns to normal.  Introducing the Vika Kaj from Ikea. The lower leg height is perfect to sit at the end of the bed and then it can be raised for sewing/crafting/office needs.  Double bonus I found a table with these legs on Craigslist in Redlands.  Not so pretty is she?


I paid $50 for it, not cheap for a Craigslist find (but cheaper than new).  The black laminate wasn't going to stay so it required a mini make over. Due to the hefty price I delved into the burgeoning paint stores in our garage to refinish her.  After looking at this blog post from Yellow Brick Home (link in name) on how to cover laminate I felt confident of  the transformation (and decided to adopted their two tone idea).  I used a sample pot of Behr paint color matched to BM Elephant Gray on the side of the table, bog standard white eggshell for the top & Rustoleum Lagoon spray paint for the legs (left over from painting a filing cabinet which is now the bedside table in this room).  All covered with 3 or 4 coats of poly finish.


With the legs at the lowest it fits at the end of the bed. Then all you do is turn them to raise the height of the table, very useful in my mind :)

An easy transformation; not technically a hack, more of a repaint. Definitely a double duty table.

Happy weekend folks!


Saturday, May 4, 2013

Baby Romper

Even though I have made many gifts for friends which have been greatly appreciated, I do still feel a little nervous that my creations will be dismissed as 'homemade' (said in derogatory tone).  
I made a simple skirt & hair clip for a friends daughter's 2nd birthday and it was gratefully received. Phew. You know, you just can't tell with some people if they get it or not!


So gratefully received was the skirt that she asked me to make the coming home from hospital outfit for her unborn child. Gulp. Now how is that for a nerve making task?!!  She had seen this gorgeous romper from the Tea Collection but she was concerned it would not be small enough for her wee newborn.


Ardmore flutter sleeve romper - Tea Collection
Any excuse to do a spot of online fabric shopping & I'm in! I bought this bevvy of beauties from this Etsy shop.  


My original thoughts were to use the Ann Marie Horner (first left) which was the fabric that popped into my head when I saw the Tea romper. However it was a little to busy for a newborn so I went with the Valori Wells, Wrenly.

For one of the first times ever I used a pattern.  Not sure why as it was such a basic shape and I altered the sleeves, added a pocket & adjusted the size!  The pattern was for a peasant dress from Sew much Ado which I printed out at 90%.  I basically followed her instructions but slimmed down the sleeves and omitted the elastic. It is a great tutorial and easy to follow, so if you feel nervous about going it alone head over to Sew Much Ado.
 

1. Attach sleeves to bodice 

2. Hem sleeves and finish seams


3. Hem neck, leaving gap to allow for elastic around neck
4. Thread elastic through neck and secure. 
5. Sew side seams and finish edges
To create the ever so slight 'bubble' hem and therefore turn the dress into a romper I added elastic to the hem.  Firstly pin the middle of the front & back hem then sew the hem (wide enough to fit elastic through) from front middle to back and then repeat for the other leg.  Add the elastic and gather to desired width.  Mine is not quite bubbled enough; I didn't want the elastic tight on those little newborn legs. Next time I would add a little extra width to the garment to allow for a better gather.

Secure poppers to centre of bottom hem
Bang in, literally, the popper studs et voila! Dress into romper.  I added a little pocket to give a front and back.


What do you think?!  I hope she likes it!  What do you make for friends babies? I have another newborn project to start, a blanket this time me thinks!


Friday, October 26, 2012

Cheap as chips curtain rod

The sun comes blazing into our bedroom window most of the day which I am just starting to appreciate as autumn has finally arrived here in Southern California.  Consequently we knew we would need a pretty heavy duty shade, to keep out the heat as well as the light.  After trawling the internet blinds.com came out the cheapest. I chose a cellular black out shade in white, and as the window is 94" wide, its quite a piece of kit.  So I decided to go for curtains as well to soften the window a little and give a splash of colour to the room.

After a rather pricey blind I was looking to save a bit of cash on the curtains & curtain rod - no easy thing with an 94" wide window. Fortunately this post at Houseofhepworths.com explains how to make a cheap curtain rod - result!

Curtain rod ingredients

10ft electrical conduit pipe (Home Depot) - $3
can of spray paint (Walmart is cheapest) - $3.79
wall brackets x2 (Betydlig Ikea) - $3
end finials x2 (Vasentlig Ikea) - $5
Curtain rings (Syrlig Ikea) x2 - $8

Cut pipe to desired length (the kind chaps at Home Depot will even do this for you).  Spray paint it desired colour, I went for white. Fix brackets to the wall. To achieve a faux pinch pleat attach the curtain hooks to inside of the curtain about an inch or so below the top.


Thread onto the pole leaving one ring on the outside of the bracket.


Attaching the finials to the end of the rod could not be easier. Lo and behold a wine cork is exactly the right diameter! I knew there was a good reason I drank lots of wine!  Screw your chosen finial into the cork then cork your rod, as the saying goes..


Once again apologies for poor iPhone pictures.


And here are the finished hanging curtains with my cheap-as-chips-curtain-rod.   You honestly wouldn't know, I would highly recommend doing this if you need a longer curtain rod. As for the curtains they cost a total of $34; $20 for the fabric from Ikea and $14 for a king sheet (from Walmart) which I cut in half. 

$57 for curtains & curtain rod is my kinda of DIY project.  The master bedroom is now finished. Post to follow shortly...


Wednesday, August 8, 2012

New baby gift

Finally I have finished the gift for my friends new baby who is now over a month old. I am not sure what took me so long; I am normally very prompt with my new baby gifts! The delay was partly due to my indecision on what to make for her.   I have done blankets in past, this one & this crochet one and bunnies but as my friend is a good sewer and her Mum even better (she's made the baby a quilt) I thought those options were out.  I spent a week or so toying with the idea of a mobile like these I saw on Pinterest but then this pin sparked an idea....

And here it is! Not quite sure what to call it? I finished it last night so no pictures I'm afraid, but I will take you through step by step, recipe style.


You will need:
  • fabric scraps
  • photo frame of choice
  • freezer paper
  • printer
  • scissors
  • sewing machine or needle & thread
  • fabric glue
  • Fray Check
First draw and cut out your letters. I ended up doing them free hand (as you can probably see!) but you could print out a template & trace them. Coat the edges with fray check.
Work out the text you want to use in Word, I decided on birth details.  Next cut a piece of fabric & freezer paper to fit the size of your printer (mine was A4). Iron the shiny side of the freezer paper to the back of the fabric. This will bond the freezer paper to the fabric and give the printer something to hold onto. Feed fabric into printer, make sure you work out which way round it has to go before you print (mine was fabric faced down). Then print text onto fabric.
I spent a little while fiddling about with the positioning of the letters then when I had it right I secured them with a dab of fabric glue before sewing them on. I also glued the fabric to the back of the frame to hold it all in place.

Welcome to the world baby Summer xx

Saturday, June 23, 2012

Quilt

I have made my first quilt.  It really was easier than I thought, although saying that lovely Nancy did the actually quilting part for me. Hope that is OK for quilt purists?!

The fun starts with choosing your fabrics.  I had accumulated mine for nearly a  year.  The bunnies were my bedroom curtains as a little girl (which my Mum made), she says the fabric was from Conran, although they do not do fabric's any more.  The ditsy pink flowers are a gorgeous Liberty tana lawn print (True Up gives a great list of stockists) which I got last summer when I was in the UK.  Several are Innocent Crush by Ann Marie Horner and the last fabric is the third curtain from her old bedroom which was no longer needed.

First job is to cut out the squares. I did 8" squares as recommended by my friend's Mum (thanks Colleen!) with 5 across & 10 long.  Then lay out the squares in your desired pattern, which takes a bit of jigging around to get the look right.  
Sew the rows of blocks together first with 1/4" seams. It was easier just to lay the fabric together rather than pin, it sat flatter.  
Press the seams to one side then join each row together to make the finished quilt. I did pin the rows together as you need to be as exact as possible.  I understand that other quilters unpick if their joins are off, the bodger in my didn't bother!

Nearly all the corners are like this...

The odd one is like this...
I decided to give the quilt a border which I squared off at the corners. I would have liked to mitre the corners but I didn't have enough fabric.  This was 6" wide as that was all the fabric I had.
The front, batting & back fabric was magically quilted together by Nancy whilst I made up the bias binding.  At her recommendation I made it 2 3/4" wide which I pressed in half (good sides out).  Machined sewed it to the front then pressed.  I used hair clips to hold it in place (it sits flatter) while I hand stitched the other edge to the back of the quilt.

 Yay! Finished!  It was used for the first time last night, hopefully the first night of many more. Sweet dreams Esme!