Saturday, May 4, 2013

Baby Romper

Even though I have made many gifts for friends which have been greatly appreciated, I do still feel a little nervous that my creations will be dismissed as 'homemade' (said in derogatory tone).  
I made a simple skirt & hair clip for a friends daughter's 2nd birthday and it was gratefully received. Phew. You know, you just can't tell with some people if they get it or not!


So gratefully received was the skirt that she asked me to make the coming home from hospital outfit for her unborn child. Gulp. Now how is that for a nerve making task?!!  She had seen this gorgeous romper from the Tea Collection but she was concerned it would not be small enough for her wee newborn.


Ardmore flutter sleeve romper - Tea Collection
Any excuse to do a spot of online fabric shopping & I'm in! I bought this bevvy of beauties from this Etsy shop.  


My original thoughts were to use the Ann Marie Horner (first left) which was the fabric that popped into my head when I saw the Tea romper. However it was a little to busy for a newborn so I went with the Valori Wells, Wrenly.

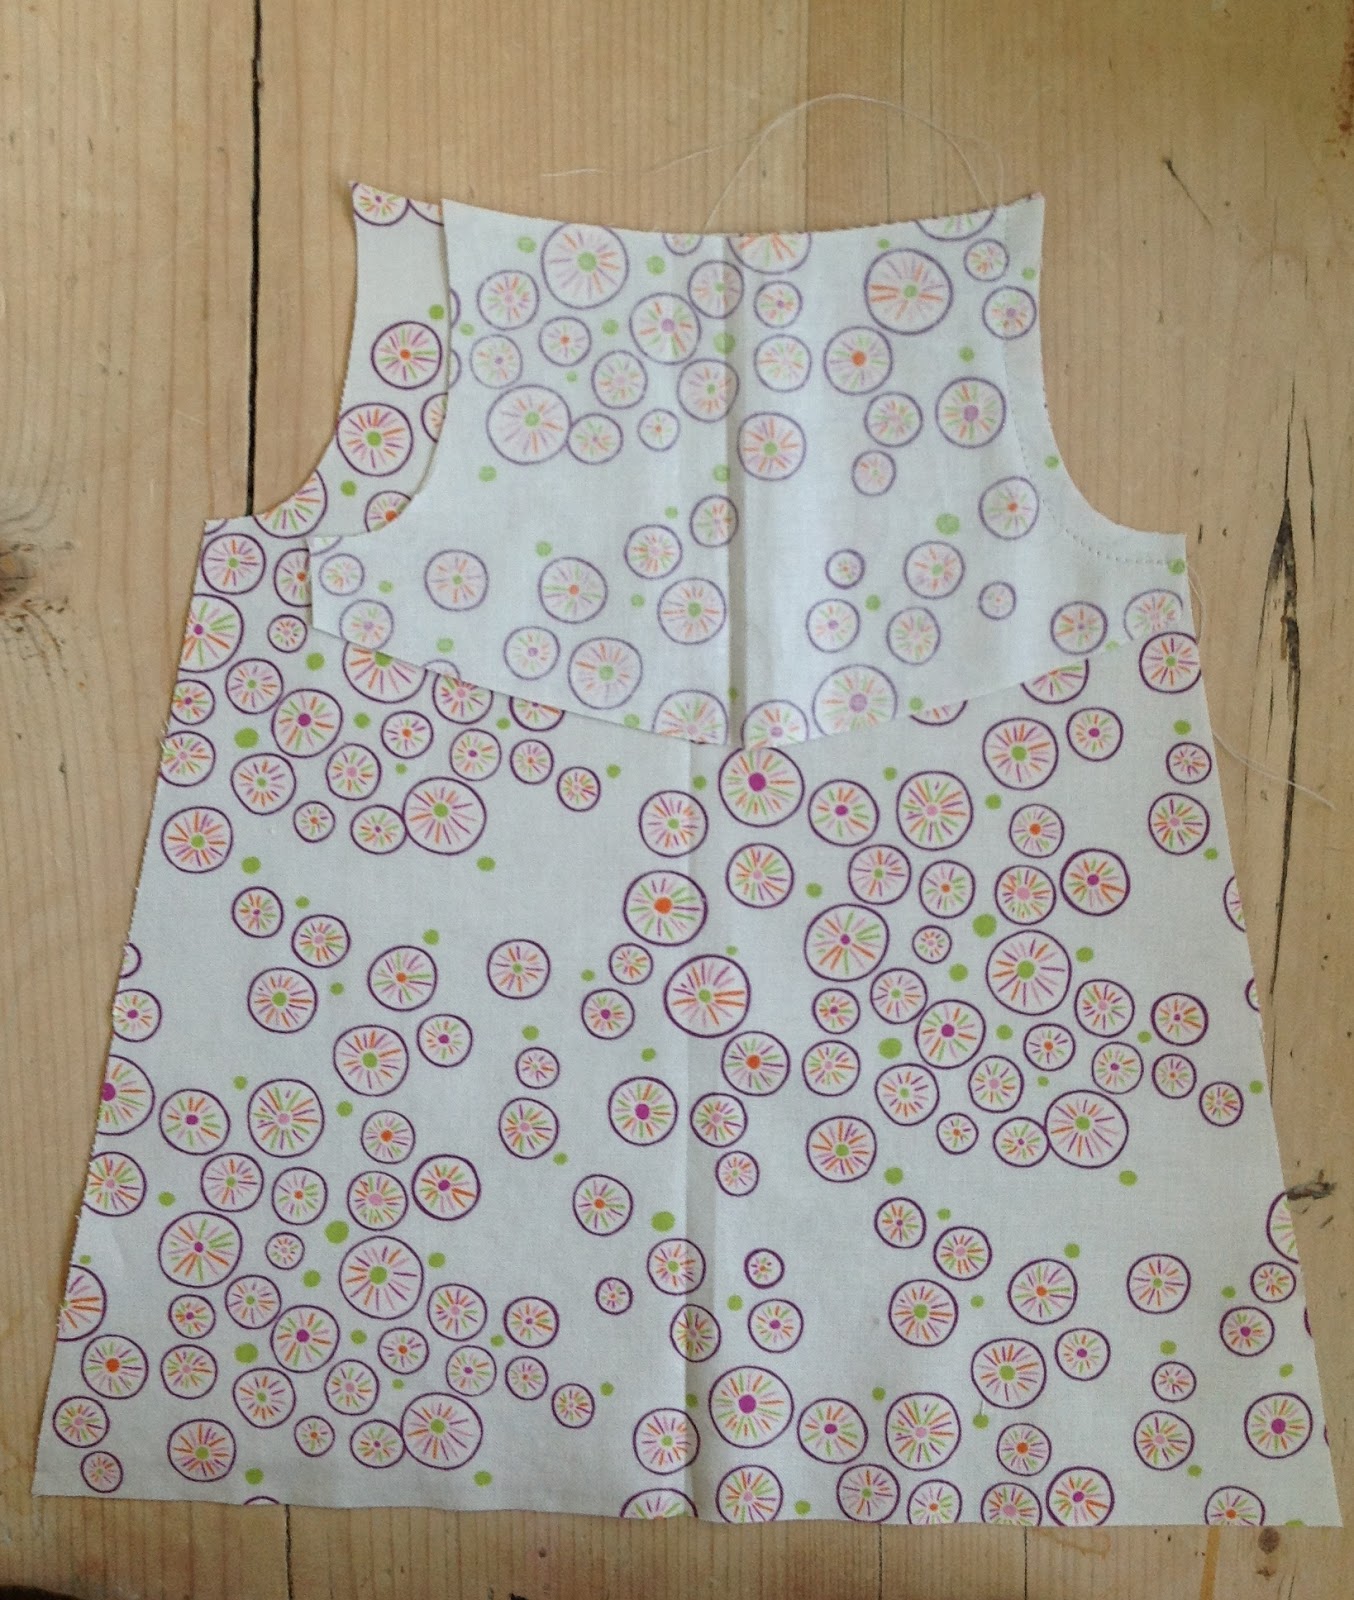
For one of the first times ever I used a pattern.  Not sure why as it was such a basic shape and I altered the sleeves, added a pocket & adjusted the size!  The pattern was for a peasant dress from Sew much Ado which I printed out at 90%.  I basically followed her instructions but slimmed down the sleeves and omitted the elastic. It is a great tutorial and easy to follow, so if you feel nervous about going it alone head over to Sew Much Ado.
 

1. Attach sleeves to bodice 

2. Hem sleeves and finish seams


3. Hem neck, leaving gap to allow for elastic around neck
4. Thread elastic through neck and secure. 
5. Sew side seams and finish edges
To create the ever so slight 'bubble' hem and therefore turn the dress into a romper I added elastic to the hem.  Firstly pin the middle of the front & back hem then sew the hem (wide enough to fit elastic through) from front middle to back and then repeat for the other leg.  Add the elastic and gather to desired width.  Mine is not quite bubbled enough; I didn't want the elastic tight on those little newborn legs. Next time I would add a little extra width to the garment to allow for a better gather.

Secure poppers to centre of bottom hem
Bang in, literally, the popper studs et voila! Dress into romper.  I added a little pocket to give a front and back.


What do you think?!  I hope she likes it!  What do you make for friends babies? I have another newborn project to start, a blanket this time me thinks!


Tuesday, April 23, 2013

Polka dot party

Last years birthday party theme was the Octonauts, you can read about the party here.  This year we went dotty! Polka dotty to be precise, or poke her (said with posh English accent) dotty as the birthday girl insisted on saying. 


The polka dot train started with the party bags.  Connie & I spent a happy morning stamping corks into paint and onto sandwich bags.


The polka dot cake was fun to make, with its polka dot cake pops inside. There are plenty of recipes out there on "how to" which I perused before starting this one. 
A kind school Mum lent me her cake pop machine, which is little bit like a waffle machine but it makes balls of cake.  I made up a two batches of my regular sponge cake mix then divided it into 5 portions to which I added radioactive food colouring. I ended up with extras; better over balled than under I thought.  Some of the cake balls (why are they called pops?!) were slightly brown on the surface from over greasing the machine.  It barely noticed in the finished cake.  Then when they were cooled I popped the pops in the freezer.

The next morning I set to work building the cake.  A thin layer of batter on the base of the tin then evenly spaced the pops on the surface, see below. Apologies for the bad photo.


Originally I made up double quantities of cake batter but that wasn't enough; a last minute panic mix of a third batch and the balls were covered. As was the kitchen...

My preferred frosting is buttercream icing which I then decorated with lovely Smarties.   
The cake got a little squished at the park!


Pretty much every piece had a polka dot in it which went down well with the party goers!

The rest of the party food was polka dotted - dot sandwiches, crackers and dots of cheese, mini tomatoes, circular tortilla chips, cuties, sugar cookies with polka dot icing, oh and hula hoops. A great English crisp!


the birthday girl tucking in
If you don't know Oriental trading head over there for a browse; it is brilliant and reasonable! I got the plates, napkins, balloons & party bag toys from there.


Have you got a birthday party coming up? Come on, join us; its fun being dotty!


Friday, April 19, 2013

A sweet en suite

There's nothing like having one splendid new, clean bathroom to spur you into action to remodel your other bathroom. This time our ensuite. Confidient of my new found tiling skills and general prowess in the whole bathroom remodel thang, I set to work whilst Mr Maker was out of town.  I lay the shower tiles first, which slapped down in an evening. Then the floor tile next; I was ignoring the elephant in the room, the 3 walls of floor to ceiling subway tile for the shower surround.  As with most projects the hardest part is starting, once I'd got Women's Hour up and running I was happy & off.  Unfortunately Mr M hadn't trained me up on using the tile cutter (one power tool at a time) so a few late nights on his return meant we finally finished off the tiling in a couple of weeks.

The scales were beginning to tip in our favour with the 'to do list' and only the odd mishap to over come (hole in pipe behind the wall behind the vanity unit anyone?!) not to mention trying to fit a glass shower screen after a few too many beers at a friends BBQ.  Have you seen the Matrix? Mr M acomplished a move similar to one of Tom Cruises' whilst getting a large piece of glass through a not so large frame whilst I was collapsed on the shower floor in hysterics. Who says DIY isn't fun?!


The shelves were my first attempt at carpentry. Don't think I'll be reaching for those tools again any time soon.  Despite being quite a good baker of cakes, I know that I am no good at doing things accurately. Carpentry is one of those things that requires accuracy.  I used Ana White's plans which I found over at YHL which were great and easier to follow.  You can just about see from the picture above the edging is rather, ahem, homemade


The picture is one of my own Instagrams which I got printed up onto canvas at easycanvasprints.com.  I love that its a local scene & the sky colour compliments the teal towel & bath mat. 


Tiles
The shower tiles were from Home Depot (Carrara marble mosaic & accent tiles and subway wall tiles).  The floor tiles are porcelain (made to look like marble-ish!) were from Lowes.

From start to finish the remodel took us 8 weeks which we are a little bit proud of, considering Mr M was away 2 of those weeks. What do you think? What's the average time scale of your projects?


Tuesday, April 16, 2013

Thrifty scores and Johnathan Adler

I do love all of Johnathan Adler's pieces especially his ceramics. In my teenage years and early twenties I went through a pottery phase so I am drawn to beautiful ceramics (how Adler first started out) of which he has an alluring collection.  However there is some thing about the scale of production and the vast range he now has that I find slightly off putting. And what's with the drug references; stash boxes & 'shrooms ?! Come on, drugs are not cool. And I haven't even mentioned the prices.....

Nonetheless I am citing Johnathan Adler as inspiration for my recent thrift scores.

Jonathan Adler charade studded taper vase $88
Alice Crick salt n' pepper vases $3
Honestly I would choose JA's vase over mine but these little salt and pepper shakers are super cute and great for displaying single stems.

Jonathan Adler two tier table $795.00

Alice Crick single tier table $14.99
I was stoked to find this gem.  It was a bit of a frivolous purchase as we don't really need another table (don't tell Mr M but I currently have 4 'spare' tables which I've thrifted needing varying degrees of attention) but you know what its like, one can't pass up a good deal!  It needs a bit of TLC - a sand down and respray and switch out of the 70's smoked glass for clear and bam she'll be good to go.  I might be able to find a home for her then...  
This purchase has spurred me on to start on the next room in our home - the sitting room.

Have you had any good thrift scores this week? Are you a Jonathan Adler fan?


Saturday, April 6, 2013

Lemon Spice Squares


You may or may not know, I live in Redlands, California. In its hay day Redlands was the citrus capital of the world (OK slight exaggeration; there were a lot of citrus groves).  There are still a few around town and they are the predominant tree type in residents gardens.  At this time of year every where you look you see trees laden with juicy citrus fruits and/or delicate blossom.  The intoxicating fragrance of the orange blossom wafts around you the moment you step outside it really is gorgeous (or sneeze worthy depending on your allergy status!). Now is the time to get busy with citrus fruits.

A friend gave us a huge bowl of lemon's from her tree; we made lemonade and lemon surprise pudding then I remembered lemon spice squares.  Lemon spice squares are part of my childhood; just saying the name stimulated my senses and I haven't eaten one for at least 15 years.

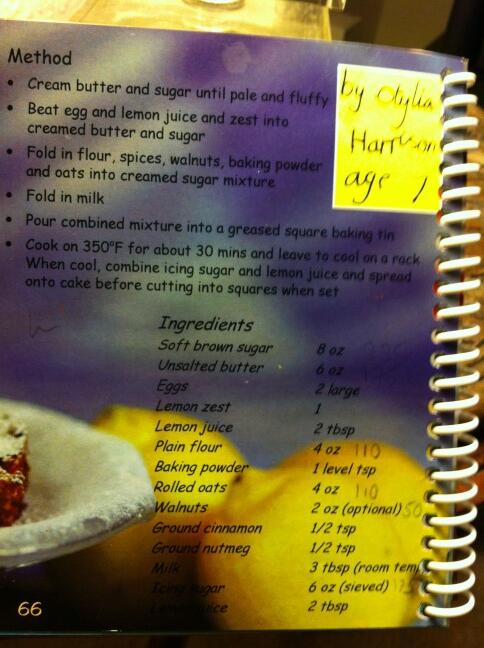
I didn't have a copy of the recipe. I tried googling it, nothing. My sister couldn't find her copy and my Mum wasn't home so no help. I then tweeted my oldest friend & she came up trumps. Yay for Harriet! Her eldest daughter had put the recipe in her school fundraiser cookbook. One twit pic later & we were cooking. Don't you just love social media?! 


My mum thinks the recipe came from her cousin Ann who lives in Vancouver, and judging by the butter quantities it did come from another era.  Lemon spice squares are moist, light, chewy from the oats and deliciously citrusy.  I think we should patent* the recipe as I couldn't find it on the web; remember you read it here first!

Lemon Spice Squares
Here it is again in case you can't read the picture

8oz of soft brown sugar
6oz unsalted sugar
2 large eggs
zest & juice of one large lemon, or 2 for a mega citrus hit
4oz plain flour
1 tsp baking powder
4oz jumbo oats
pinch of salt
1 tsp (at least) cinammon
1 tsp (at least) nutmeg
3 tbs milk

6oz sifted icing sugar
2 tbs of lemon juice

Preheat the oven to 350F.
Cream the butter & sugar together until pale & fluffy. Much easier if you use an electric mixer.  Beat in the eggs, lemon juice & zest to the butter mix. It does look a bit curdled, don't worry. Now fold in the dry ingredients - flour, baking powder & oats.  Lastly stir in the milk.  


Spread into your lined tin (mine is approx 7x11") and bake for 30-35mins.  Do the clean skewer test, it should be slightly browned on top.  


Whilst it is baking mix up the glaze of icing sugar and lemon juice. Pour over the cake whilst it is still warm in the tin.  Cut into squares and devour.


Next time I make them I may have a fiddle with the quantities to lighten the butter load, use a mix of wholewheat & plain flour, more oats etc but for now we were happy to enjoy them just as I had remembered.

Do you have a recipe from your childhood? Do you still use it? 


Monday, February 11, 2013

Quick Valentine cards

Not long until the big V day.  These cards are so quick and easy to do and use supplies you normally have at home already.  It is great craft activity to do with the kids; given they usually have 30 odd to do these leave them plenty of time to get writing the names!


I bought a pack of cards & envelopes from Joann's but you could do postcard style and cut the card yourself (reducing cost).  We had poster paint so I used that and watered it down a little which makes a better flicking/spraying action. The heart was cut free hand from another piece of card. I ended up using a couple as they got harder to get off the more painty they got.


Using a little spray adhesive stick on the heart and flick away!


We found just bending the card levered up the heart enough to peel it off put it onto the next one.


Now onto writing those names....

Happy Valentine's Day x

Sunday, February 10, 2013

Over sized ruler height chart


DIY over sized ruler height chart
I made our existing height chart on a whim with the girls as an afternoon's activity a few years ago.  Whilst it is bright and colourful and made by them its not going to stand the test of time.  .  
My girls love their height/growth chart.  They are bounding with enthusiasm and excitement when Daddy gets out the special book as they stand like soliders with backs against the wall and can be crestfallen if they haven't grown since he last measured them.

When I think about height charts I think about pen marks up a wall.  I love the permanency of that, seeing your little people grow up before your eyes.  So at the back of my mind I had a thought that I wanted to upgrade our existing chart to something that would stand the test of time.
When I first started really looking at blogs I came across this beautiful embroidered growth chart at the Student Teacher. Sadly her blog is no longer accessible but she did have a great tutorial and I strongly considered make this one.

051911-growth2.jpg
Image: The Student Teacher

A friend of mine whose blog is also out of action made this great height chart from old rulers, which I think may have sparked my imagination.


Image: A Year Above the Shop

One day (or was it night?) whilst looking at Pinterest wasting my life away looking for ideas I came across this growth chart from Dear Lillie. Bingo! Obviously I wasn't going to pay $70 when I could enjoy making one myself.  However it is a lovely chart so if you don't fancy making one pop on over to them.


Source: Dear Lillie oversized ruler growth chart
The first port of call was Home Depot for a piece of wood.  Mr Maker is the wood man so he took pleasure (seriously) in picking me up a plank; it is cedar and was $25. You could get a cheaper piece to get the cost down but make sure you spend time getting a flat, level piece.

I tried out various stains I already had and then went with the darker milk paint.

However I didn't like the end result.  It came out blotchy, most likely application error rather than the paint itself.  So I sanded it off and applied a coat of Feed-N-Wax.  The end result was rather pleasing; a warm wood colour with the grain highlighted. Sometimes the best results are the product of a mistake.


The stencils were from Lowes (click for link) which turned out much cheaper than any from Michael's.  I decided on the format and penciled on the numbers and lines.  As per instructions on the stencil box I attached them with tape and began dabbing/blotting on the paint.  An old not-washed-out-properly stiffened paint brush was the perfect applicator.

Bam! School boy stencil error!  Rather serious paint bleed from the edge of the stencils.  Take two:  I used a spray adhesive to hold them in place which gave lovely crisp lines.


Job done.  Two weeks later its finally up on the wall, now I just need to copy over our old measurements.  


Old & new
Reluctant dressed up model
Break down of costs

  • Wood - $25
  • Stencils (which are reusable) - $5.66
  • Paint - $4.95 I only used a miniscual amount so plenty left for future projects
  • Milk paint & wax - $0 
  • Wall hook - $2
Really the total cost was about $28.  This doesn't include my time - a few hours, but what a saving.  Got to love that.