Sunday, August 30, 2015

Chocolate courgette (zucchini) muffins - grain, nut & dairy free

I read an article in a UK newspaper in which the journalist stated going out of a summer evening was dangerous.  The reason being was the fear of coming home to a bag of over sized courgettes (aka marrow) on their doorstep at this time of year.  Sadly this doesn't ring true in my neck of the woods, but I do have my own courgette plants to deal with.

I've written up various recipes for courgette overload (click here) and this one is a variation of the chocolate cake recipe I posted before. However this version is grain & dairy & nut free. My eldest has a friend who is allergic to nuts & dairy and I struggle for 'exciting' things to give her for a snack. This recipe hits the mark; just don't let them see you make it (its rather off putting!).


Chocolate courgette muffins

4 eggs
1 ripe banana
2 tbs cocoa powder
1/2 cup coconut flour
1 tsp baking soda
pinch of salt
1 tsp cinammon
1/4 cup of maple syrup (or honey)
1 medium sized courgette grated
1/2 cup of chocolate chips

This makes about 12 muffins or it can be made into a loaf.

Preheat the oven to 350F and grease the muffin tin.

Blend all of the ingredients together (except the courgette & chocolate chips) in a blender until fully combined.  Take care to ensure the baking soda is mixed in well with the coconut flour before you add it to the wet ingredients. It can clump otherwise.  Stir in the courgette & chocolate chips by hand.  Fill the muffin tin about 3/4 full, they don't rise much.  Bake for about 35-45 mins, test with a skewer (if they are done it will come out clean).  Cool on a wire rack.  

If you do the loaf format it will take longer.


Saturday, August 29, 2015

Snack attack - Raspberry and almond bars

The girls are back to school so packed lunches and afternoon snacks are back on the menu.  These bars are healthy-ish, tasty and filling which is a must in an after school snack. Almond and raspberry is a winning combination.  Will even declared them the best thing he'd tasted all day; thumbs up all round!


Raspberry & almond bars
Recipe adapted from Real Simple

1 cup of jumbo (old fashioned) oats
3/4 gluten free flour
1 1/4 cup of whole raw almonds
6 tbs coconut oil
1/4 cup of honey (mild flavored)
3/4 tsp baking soda
pinch of salt
1 tsp of vanilla extract
1/2 cup of raspberry jam

Preheat the oven to 350F and line an 8" square tin with baking parchment.   Blend the oats, flour & 1 cup of the almonds in a food processor until ground.  Add in the rest of the ingredients, except the jam, and pulse until combined. It will form a gritty thick paste.  

Reserve about 1/2 cup of the mixture.  Using your knuckles press the remaining mixture into the tin until flat & evenly distributed.  Using an offset spatula spread the jam over the base.  Take care to get jam up to the edges and in the corners.  Pulse the remaining 1/4 cup of almonds until roughly chopped. Sprinkle them with the reserved mixture over the jam.

Bake in the oven until golden brown on the edges and bubbly, about 45 minutes.  Leave to cool completely in the tin before cutting up.  I made about 16 squares. Store in the fridge.


Almond jammy goodness.


Saturday, June 13, 2015

Anna inspired costume

The Frozen frenzy died down a while ago for my girls (isn't it about time Frozen 2 came out?!) but I think it is still very much alive amongst the younger ones. If our recent trip to Disneyland and the number of kids in Elsa costumes is anything to go by.  

My goddaughter was a little late to the Frozen party, in fact to the whole movie watching thing, so she is still very much a rampant fan.  I decided to make her an Anna costume for her birthday (Thanks Rob for the inspiration!). The sewing element is very simple and the techniques could be applied for any number of princesses, if you are that way inclined.


The skirt is a basic circle skirt with elastic sewed directly into the waistband.  Circle skirts are so easy to do and give the desired swirlyness. The cape is then the same principle except you then cut the circle of fabric to give the opening and instead of attaching a waist band you attach a hood.  I chose fleece for the cape which doesn't require any hemming, bonus!


To make the bodice I used one of my daughters vest tops as a template to cut out the basic design. Then created a velcro fastening at the back for ease of on/off.  

Cape detail
The great thing about making dress up costumes is you don't need to be too hung up on perfection; just make sure your seams are good and strong as these outfits can get ripped on and off at lightening speed several hundred times a day!


I am pleased to report the outfit was well received - "Best present EVER!" was mentioned! 


Wednesday, September 24, 2014

Spiced Apple bars

It is officially Fall.  Bulbous pumpkins are taking over the fresh produce at the supermarkets and stores are in full on Halloween mode.  It all seems slightly irrelevant as its 37oC outside, we are still swimming in the pool and slurping ice pops!    However not one to miss a baking opportunity Connie & I decided to make these Spiced apple bars which have a definite autumnal ring to them. 


In the UK they are known as flapjacks and were a favourite in my house growing up, with or without the apple.  They are fun for kids to do and worth the fight over the bowl licking rights!

The recipe is slightly adapted from her cookbook "Children's book of Baking".

Spiced Apple bars

2 large or 3 small apples (any variety will do)
6oz unsalted butter
1/2 cup soft brown sugar
2 tablespoons of maple syrup
1 tsp cinnamon
1 tsp ginger
1/4 cup sultanas or raisins
2 tbs sunflower seeds
1/2 cup oats
1/2 cup jumbo oats

Line or grease a 7 x 11 inch tin. Preheat the oven to 325F.

In a medium sized saucepan melt 1oz of the butter. Peel and chop the apples into chunks and add to the melted butter.  Cook them over a low heat until the apples soften slightly, 5 - 10 minutes.  

Add the rest of the ingredients except the oats and seeds.  Stir until the remaining butter and sugar has melted then remove from the heat. Stir in the oats & seeds.  Tip the mixture into the tin then smooth down the top with the back of a spoon.


Bake in the oven for 30 minutes until dark golden and still soft.  Allow to cool in the tin then transfer to a cooling rack and cut into bars or squares.  Be careful not over cook them as they become dry and brittle.


Might of eaten the corner bars....
The house is filled with a delicious aroma which is reminiscent of Autumn, even if its nothing like it outside!


Friday, August 22, 2014

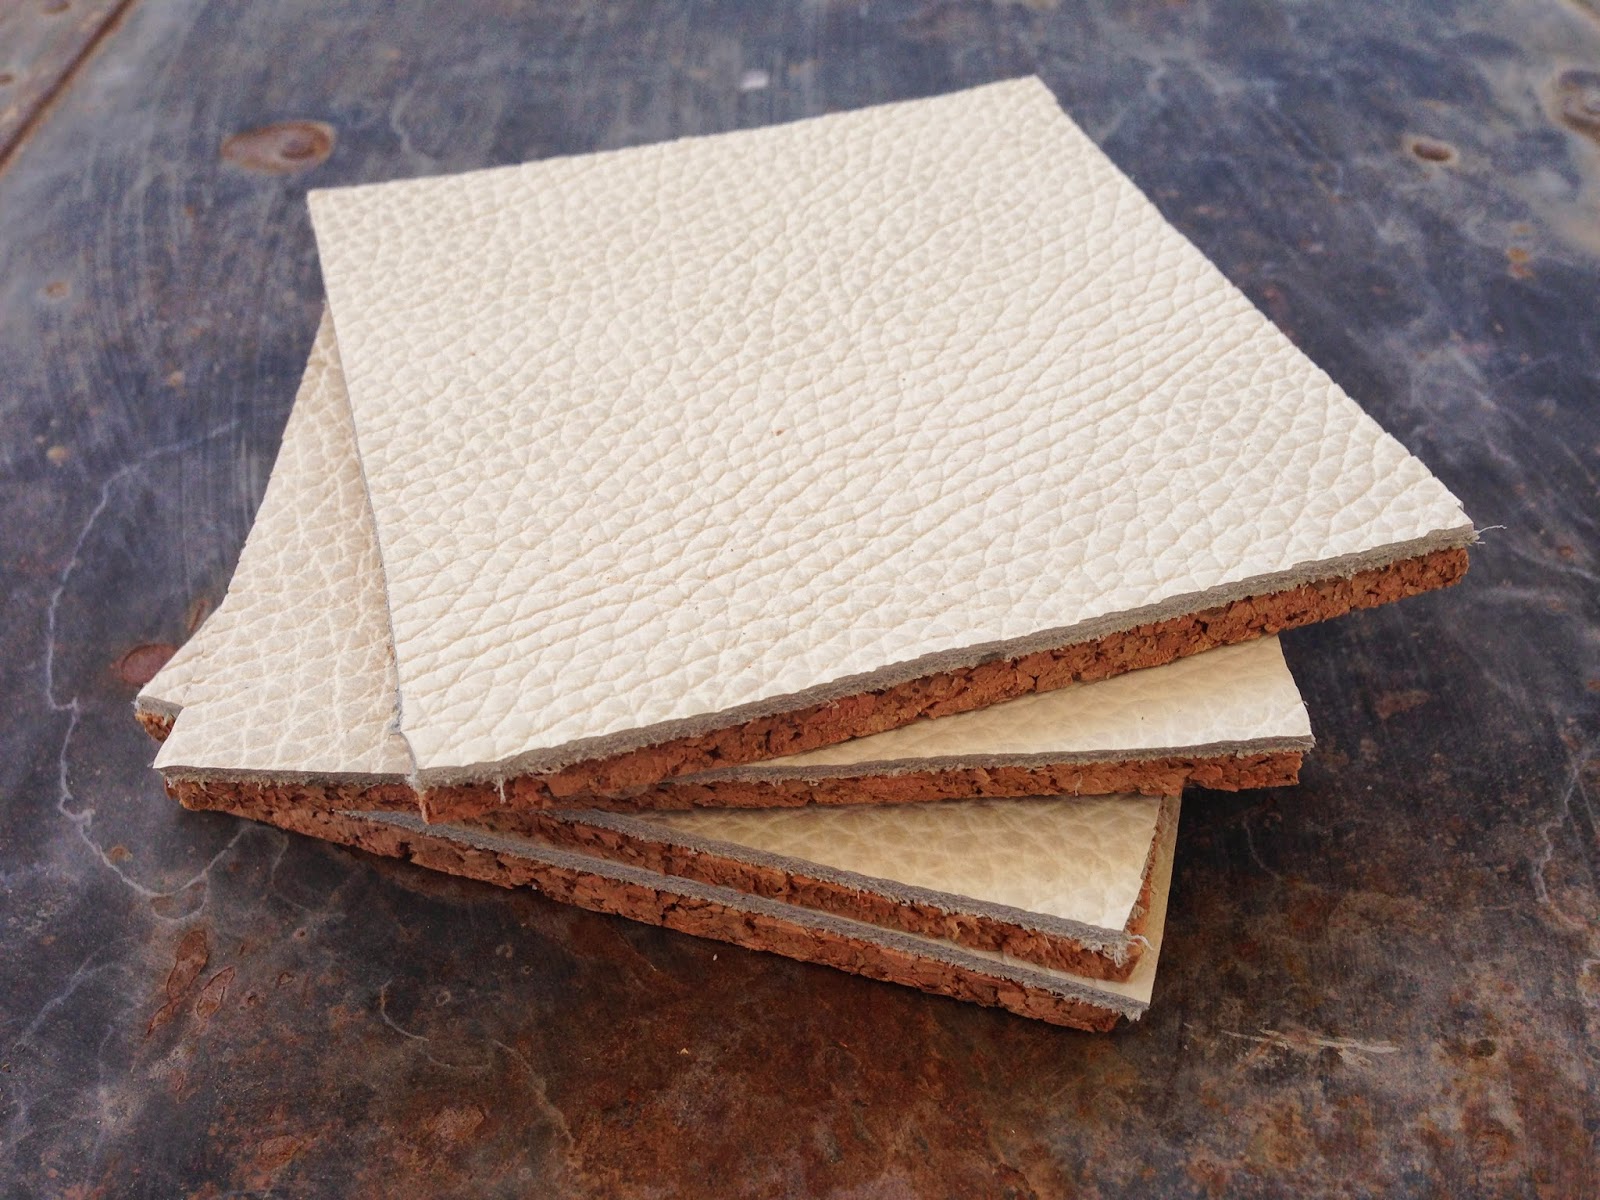
Leather and cork coasters

In my previous life (living in UK) I didn't have coasters, I would have balked at the idea of even owning one.  Possibly due to the 'granny' image or the fact my sitting room was so small we didn't have a coffee table, and therefore no need for a coaster.

Another country and a new perspective; coasters are in my good books.  

Esme & I made these ones a while ago.  One got eaten (seriously) by a friends little boy and one recently got ripped. Cork is great for coasters but these weren't quite durable enough.

Using leather leftover from having a pair of chairs recovered I've made a new batch. More durable and rather more sexy don't you think?!


First up cut out squares of cork and leather (you can get scrap bags of leather from craft stores which would be perfect for this) using an X-acto knife . Mine are 4" x 4".


Glue the cork and leather squares together using a good quality glue.  Don't worry if the squares don't 100% match up, you can trim them up when the glue has dried.


Using masking tape mark out your pattern. I went for geometric, my current love is anything geometric...


A great little craft project which takes no time (hour or so) and uses readily available supplies.  

Any suggestions what to do with the rest of the leftover leather?

Thursday, July 31, 2014

Gluten free banana bread

Its 8.15pm and I'm hungry. We have cupboards full of food but nothing to eat, you know the scene?!  I have had this banana bread on my mind since we returned from our summer holiday and was planning on making it with the girls.  I can't wait. I've made it. It is so quick and easy, requiring ingredients you have to hand (who doesn't have zillions of brown bananas in their freezer?) and only one bowl to wash up. Yay!


Gluten Free Banana Bread
adapted from this recipe

3 large ripe bananas
1 egg
3 tbs coconut oil
3/4 cup milk (dairy or non dairy)
1 tsp vanilla extract
1/3 cup brown sugar
3 tsp baking soda
1 cup almond meal
1 cup cashew nut meal
1 cup gluten free flour (I used brown rice flour)
1 cup of jumbo oats 
1 tsp ground cinnamon
pinch of salt
3/4 sultanas

Preheat the oven to 365F.  Grease and line a loaf tin.  Mash the bananas then add the wet ingredients.  Mix thoroughly.  Add the dry ingredients to the wet and mix until combined. Lastly stir in the sultanas.  Pop in the oven and bake for approximately one hour, until golden on top and a skewer comes out clean.

Cut yourself a generous wedge, top with butter if you desire (I do) and even jam if you are feeling decadent. I keep mine in the fridge in an air tight container and it will last about a week. Its also delicious toasted.


Go make it, whatever time of day it is. 


Monday, July 14, 2014

No churn Rocky Road Ice cream

The summer heat has arrived in Redlands; days hover around the mid to high 30s and the nights are fractionally cooler.  So ice cream is definitely on the agenda.  This is a super easy recipe that does not require an ice cream maker or the hassle of having to take it out of the freezer to stir every hour.  It is very rich but grown ups and kids alike gobbled it up at our 4th of July party.


Another bonus of this recipe is it does not require exact measurements, use whatever you have to hand and what takes your fancy!


No churn Rocky Road Ice Cream

1 can of condensed milk
600ml of heavy cream
1 1/2 cups of chocolate chips, melted
Equal amounts of the following:
crushed cookies (I used plain vanilla cookies)
dried cranberries (or sultanas)
mini marshmallows
semi sweet chocolate chips
chopped nuts of your choice (optional)

Using an electric whisk mix together the cream and condensed milk until thick. 
'Ribbon' thickness
Stir in the melted chocolate until fully incorporated.  Finally stir in the Rocky Road ingredients.  Transfer to a Tupperware with a tight fitting lid and freeze overnight.  Be warned it makes a lot!


Enjoy x