Wednesday, December 14, 2011

Reindeer Cookies

And so the stint in the kitchen continues....2 dozen cookies for the play school cookie exchange.  I decided on the reindeer cookies as I'd seen several on pinterest, see here.  I used my own cookie recipe with a packet of seasonal M&M's (didn't want to run out of red noses!) & small pretzels.

Plain biscuits (or cookie if you are American)
1 cup of butter
1/3 cup of sugar. I used a mix of brown & white
1 egg
1 tsp vanilla extract
pinch salt
 2 1/2 cups of flour sifted

Preheat oven to 360F
Cream the butter & sugar until pale. Slowly beat in the egg. Stir in the rest of the ingredients.  Leave the dough to rest in the fridge for at least an hour.  Rather than rolling out I then rolled the dough into balls which I squashed & flatten to form a sort of reindeer face shape.  Bake in the oven for 10mins. They should be still pale but just on the turn.  
Next you need to work SUPER fast to turn them into fully fledged reindeer.  Press in the pretzels taking care not to snap them & the M&M's for eyes & nose.  I found the pretzels wouldn't stick so I used the left over chocolate from the Peppermint creams to wodge them on.  By the end of the second tray nothing was sticking & I was in all out bodge mode (at was 9pm). The last few look like roadkill, but I'm sure the kiddo's at play school won't notice :-).  


The lesson to be learnt is don't let the biscuits dry out or even put the pretzels and M&M's in before you bake.....


Tuesday, December 13, 2011

Peppermint Creams

Like many of you (I suspect) peppermint creams were my first experience of "cooking". My sister and I had a Blue Peter cookbook and this was one of their tried and very tested recipes, along with Grandma's stick jaw toffee & coconut ice. Sadly neither of us have the book any more so this is not the original recipe.  I like this one as it doesn't use raw egg white so its a little more kid friendly.  We have made a batch for my eldest to give as teacher gifts.  Lets hope they like them!

Peppermint Creams

400g icing sugar
4 tbsp evaporated milk
2 tsp peppermint essence
green food colouring (optional)

Makes approx 30

Sift the icing sugar into a big bowl.  Pour in the evaporated milk & peppermint essence and mix until it binds stiffly.  Generously dust the work surface with icing sugar and kneed the mixture until its a smooth glossy dough.  If you are using the green, divide your batch into 2 and add a few drops of green food colouring to one of them. Kneed in. Wrap each batch in cling film and pop in the fridge for about an hour.
Prepare a sheet of greaseproof paper by rubbing with a little vegetable oil.  Dust the work surface & rolling pin generously with icing sugar and roll out your dough to about 1cm thick.  Cut out desired shape (or roll into balls & press) and place them on greaseproof paper.  Put back into the fridge to dry out/harden.  You can drizzle with chocolate, or blob as we did! Keep in an air tight container until you need to dispatch.


Saturday, December 10, 2011

Vintage soda crates

I stumbled across these beauties whilst browsing Craigslist the other day. I couldn't resist. Ended up buying 10 of them. Why you ask yourself, no I don't know either.  

With a dust down and a sand of the rough edges (not too much I like the distressed "vintage" look) I think there uses are boundless.  My original thought was a few of them toy/book boxes for the girls rooms. That leaves me at least 6...What would you use them for?

Friday, December 9, 2011

Thrifty find

I bought this wooden cupboard months ago for 14 bucks from Goodwill and have finally got round to finishing it.  I fell out of love with it over the months, as you do when projects kick about for ages.  I am happy to report we are right back there after I finished it off & filled it with my daughter's favourite trinkets (OK my favourites of her trinkets).


Managed to get the maps in another project. That atlas for a dollar from a yard sale was a dollar well spent.


Tuesday, December 6, 2011

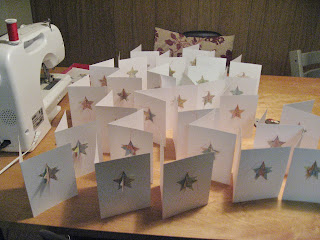
Christmas cards

Agghhh mail merge! Why do you taunt me so with your simple sounding instructions? Yet give me 1 1/2 addresses on each label?  More the fool am I for trying to go high tech and print my address labels this year.....Anyway, the battle was won (after many tedious hours and failed attempts), we have labels stuck on envelopes. Thank you to my eldest daughter who helped with the sticking.  The US mail man will be saved my lazy scrawl.

I am rather pleased with this years Christmas cards. They've got maps on them, what's not to like?  


I am blogging around the Christmas tree with the best of them and have posted a link to my cards with The 36th Avenue.  There are some other fantastic cards. Inspiration for next year!


Sunday, December 4, 2011

Its beginning to feel a lot like Christmas

It is official, the build up to Christmas has started in our house, and I'm excited! My list of pre Christmas jobs is still being stored "up stairs" but will soon need to be converted to paper to ensure I don't forget anything.


We made Christmas stones the other afternoon (can you guess which ones the girls did?). It was a great way to spend a cold and windy afternoon and really got us into the mood.  They are currently serving as a table runner decoration.


These muffins were a house warming gift as the flavours seemed appropriately seasonal.  You could even swap the dried cherries for dried cranberries to up the Christmasiness.  I think I will be making them again over the next few weeks, maybe even for Christmas morning?


Spiced apple & dried cherry muffins
175g of apple peeled and finely chopped (the original recipe calls for a bramley, but any variety will do)
75g dried cherries
75g golden sugar
1 large egg, beaten
150ml milk
75ml oil
250g self raising flour
1 tsp baking powder
generous sprinkle of mixed spice (at least 2 tsp)
pinch of salt
demerara sugar to sprinkle on top

Heat oven to 375F (190C).  Add peeled & chopped apple to bowl with all but 12 of the cherries, golden sugar, egg, milk & oil. Mix together.  Sift in flour, mixed spice, baking powder & salt.  Fold the ingredients together ensure all the flour is mixed in but try to keep it light.  Divide into 12 muffin cases then top with a cherry & a sprinkle of demerara sugar.  Bake for 25mins until golden. Turn out onto wire rack.

I think this is the earliest we have ever got a tree, fingers crossed it hasn't dropped all of its pesky needles by the 25th....I love getting out the tree decorations, its like seeing old friends again, some of them perky and pleased to be on show, others a little tired and a bit droopy.  Our tree is super sized in comparison to our UK version, I think we need to get some more decorations, what do you think?

Right then, enough blogging on with the "real" jobs - making mince pies & the Christmas cards.


Monday, November 21, 2011

A children's bag

The request for Hello Kitty tatt for my god daughter's Christmas present was easy to for fill - that Kitty is everywhere.  I wanted to make a little bag for her to store her HK treasures in. I found this fab HK fabric online but as I only needed 1/2 yard I couldn't really justify the delivery cost.  So I opted for some cheery prints from the local Joann's, only $4.99 a yard. The bag is now multi-functional, not just for Hello Kitty treasures.


I followed the tutorial for the Lindie Bag from Craft Apple and it has turned out extremely well.  This bag gave me an opportunity to expand my sewing repertoire;

  • First proper use of fusible interfacing
  • First following of a pattern to the letter AND it working
  • First attempt at boxed corners
And I am very happy to report all were successful firsts, yay!


Friday, November 11, 2011

QR code

Having made the Tooth Fairy pillows I thought I should attach a label to get my name out there, and possibly get my readership into double figures (I can but try).  
Linda at Craftaholicsanonymous posted how to make a QR code which she put on her business cards.  Doubtful I'll ever be at the business card stage but wanted something simple for my tag.  My husband was mildly impressed I even knew what a QR code was! The website is super easy to use and its free to generate your own QR code.  The tags, ribbon & brass safety pins were from Joann's and labels (which I cut to size) were from Office Depot.


I think the tag is a work in progress, but for first round attempt not bad.  Lets see if it generates any traffic...

Tooth Fairy pillow x10

The Tooth Fairy pillow was well received by my soft toy loving nephew.  My sister, who isn't crafty (I can put that as she doesn't read my blog!), was also impressed. So much so that she order x10 for my nephew's school Christmas Craft Fair.  I rather enjoyed the repetition of making more than one of something and the simplistic nature of the task. That tells you something about me doesn't it?!


I have my second order, 2 more for my cousin's kids.  This could turn into a "thing"...

Wednesday, November 9, 2011

Tea & Cake

I invited some friends round the other weekend for tea and cake because I wanted an excuse to bake. Not of course that you need one...  This is the best sponge cake recipe ever.  Its the one I use for all birthday cakes.  The chocolate icing recipe is from Queen Delia.


Sponge Cake


250g softened unsalted butter
2 tsp vanilla essence
1 1/2 cups of caster sugar
4 eggs 
3 cups self raising flour
1 cup milk


Heat oven to 325F. Grease & line your chosen tin.
Beat butter, vanilla 7 sugar in a bowl until pale & fluffy. The longer the better, at least 5 mins.  Beat in the eggs.  Start off by adding a teaspoon full at a time, gradually adding in a little more each time until combined.  Stir in flour & milk in batches.  Go easy on the milk, sometimes I don't feel the mixture needs all of it. Spread mixture into tin & bake in the oven until the cake has turned a golden colour and a skewer comes out clean.  The time will depend on the type of tin/pan used and your oven.  Usually approx. 30mins. Cool in the tin for 5 mins or so then turn out onto a wire rack.


Chocolate fudge icing


75g granulated sugar
75ml evaporated milk
110g semi sweet chocolate (ie. plain dark)
40g butter
vanilla essence


Stir sugar & evaporated milk in a pan over a low heat until the sugar has dissolved. When all the granules have dissolved bring the mixture to the boil & simmer for 6 mins without stirring.
Take the pan off the heat & stir in the chocolate then butter and drops of vanilla essence.  Allow to cool slightly before icing the cake. It will thicken as it cools.


The above quantities made, filled & iced the cake below, sorry not sure of dimensions (can't be bothered to dig out tin and measure!). Guestimate - 8" inch cake.
I used Smarties & purple sugar to decorate.

Johnny, the play school pet sampling the cake!


Sunday, October 30, 2011

Twit Too Woo

My fascination with Pinterest hasn't waned, probably because it still is a great source of inspiration (or place to steal ideas from depending on how you look at it).  The idea for the girls Halloween costumes came from a pin which lead me to this website.  
I got 4 mens shirts from Goodwill (totalling 5 bucks, love that place), leggings from Goodwill & two long sleeve black T shirts from Walmart for 4 bucks each & glasses from Party City.
I made a template for the feathers and set to cutting up the shirts.
I got into the zone and cut up all of each shirt which in fact gave me far too many "feathers".  I'm sure I'll find another use for them one day...
Then sewed them in rows onto the T shirts from the bottom up.

I covered the front & the back, but not the arms - why not? don't know.  I bodged feathers to the glasses & attached a felt beak using tape and a lot of glue.  The same felt was used for the feet, held on with pipe cleaners.
I think both outfits cost a total of $15, which is a steal. 
Happy Halloween


Friday, October 21, 2011

Thai Pumpkin Soup

Pumpkins are in season & available in a variety of weird and wonderful shapes. My favourite to cook with is butternut squash. Although they  are all interchangeable in most recipes.
This recipe is from a Waitrose recipe card from October 2004! Over the years its been adapted and tweaked to today's version given below.


1kg (approx) Butternut squash, peeled, seeded & cut into even sized chunks
1 tbsp vegetable oil
1 onion chopped
thumb sized piece of ginger chopped
splodge of Thai red curry paste. 
400ml of coconut milk
400ml stock or water


Preheat oven to 180C. Put pumpkin chunks in a non stick tray, season and toss with a little oil.  Roast for approx 30 mins or until tender. Don't worry if some bits char, it adds flavour.
Heat oil and sweat onion & ginger with the lid on for 10mins. Stir in the curry paste (if using, it still tastes good without) and cook for a minute or so.
Add in pumpkin, coconut milk and stock or water.  Cover pan and bring to the boil, then simmer for 5 mins.
Puree the soup in batches and return to the pan to reheat for serving. It usually comes up quite thick so I add extra water at this stage.
+
Its a great Autumn Fall soup for all the family. Just leave out the Thai paste if you don't like it spicy or add in more if you do!

Friday, October 14, 2011

Tooth Fairy pillow

My nephew has lost his first tooth, congratulations Thomas! He had been furiously wobbling the tooth for months and then finally it happened whilst eating a pear at school.  Unfortunately the tooth went the way of the pear never to be seen again.
As you can imagine there was much debate and discussion; how would the Tooth Fairy know to come if there was no tooth to take?  My sister suggested writing the Tooth Fairy a letter explaining the ill-fated events which Thomas did.  His suggestion was to sleep with his mouth open so the Tooth Fairy could see the missing tooth, which he also did.  The two pronged approach was successful and he found a pound coin under his pillow the next morning.
To save such dramas next time I made a little Tooth pillow.  It can be left out for Tooth Fairy, with or without a tooth inside.


There are many different versions of similar things out there in the blogworld. Some quite cutesy, like this one and some are a bit more simple, like this one. My version was super easy and quick.  That's the kind of make I like!


Tuesday, October 11, 2011

Cashmere baby blanket

Is it just me or can making be stressful as well as enjoyable?!  I think in a perverse sort of way I thrive on the stress of my projects. This particular "make" had its fair share of said stressful situations, from start to finish. So bare with me, it could be a long & rambling post.....


I wanted to make a something for a friends baby and as its number 3 thought I should try something different.  I saw this baby blanket and this one made from recycled cashmere jumpers and decided this was the project.  My Mum has an impressive collection of cashmere jumpers, several of which she has had since I was young so I can confirm the durability of cashmere. And I have always loved and appreciated the kitten softness of the yarn.


I picked up 3 cashmere beauties from my local Goodwill, all moth free (do you get moths in California?) and a not too small, for a bargainly sum of 17 bucks. I know! How good is that?!!  I washed them in the machine at home & laid them to dry flat.


So came the first stress of the project.  Should I felt them? Will they all unravel when I cut them up? How should I cut them? Can I really cut up precious cashmere jumpers?! After much googling, which seemed to suggest that I DID need to felt them I decided not to. I wanted to preserve the integrity of the wool to optimise the cuddliness of the blanket.  So here is my first piece of advice - you do not need to felt woollen jumpers if you want to cut them up. They do not unravel!


I cut the jumpers into 4 - 2 arms, a front & back. Then into strips of even width.


Onto stress no.2 - how to sew knitted pieces together.....A consultation with my talented crafty friend Nicola at a pip and a peach concluded that a zig zag stitch was not necessary, a shorter stitch length of a regular stitch would do the job.  After laying out the design I machine sewed the pieces together to form one large blanket sized rectangle


After ironing the seams did sit flat (unlike in the picture!).  I attached the backing fabric, Heather Ross 'Far Far Away', by pinning good sides together and sewing 3/4 of the edges then turning right side out. By now it was starting to resemble a finished blanket.
Simple job of sewing on the bias binding and one finished blanket, right? Oh no! Mega stress time! Let's just say bias binding is a skill I need to work on....I followed this youtube clip which got me through it but I'm not sure its the best method to use.


To join the two sides of the blanket I discreetly stitched the inside woollen seems to the orange long john's.  Hooray! One finished blanket. Its not a perfect but I am sure its new owner will be happy to dribble all over it.


Sewing, stressful, never...


Sunday, October 9, 2011

Wreath

The jury is still out for me on the wreath-on-door-thing.  Back in the UK we always had one at Christmas time, a few springs of holy tied together with a festive ribbon, the rest of the year the front door remained naked.
Stateside wreaths are BIG and in particular this time of year and the run up to Christmas. After seeing many pretty ones on Pinterest I decided to jump on board, for this year anyway!


I copied this design from Six Sisters' Stuff blog as it seemed a good use for some of my left over wool.  I used a 12" foam wreath from Joann's which used a ball of wool.  I made the felt strips slightly narrower than suggested as the wreath was smaller.
I stitch the ruffle around the wreath as I plan to swop out the orange for red for Christmas. 

So what's the verdict? Wreath or not to wreath?

Thursday, September 22, 2011

Crochet Cushion

I have been itching to get crocheting again since completing this blanket for PS which was my first foray into the world of crocheting.  I still haven't progress from the basic granny square, but who cares?!  It is a relaxing way to spend an evening watching our new favourite programme The Hour and to my amateur eye the end results are still pleasing....!
Pointing out favourite colours


I made a basic cushion cover from an old pillow case then hand stitched the two oversized granny squares onto the cover & cushion. Voila, a cushion for Connie's room!


Monday, September 12, 2011

Tandoori Nights

When I was young and free my then boyfriend (now husband) & I spent 3 months in India. Many of the memories are fading now but I am still clinging onto my food related ones.  Tandoori Nights was a restaurant in Jodhpur. The tables were outside in a garden dimly lit by strings of fairy lights and I remember the feel of the dewy grass on my feet. Anyway the star was the tandoori chicken. Flame red & slightly charred but with succulent flavourful meat.

Evil bunny eyes..
I have been meaning to cook up an India feast for a while now but have only just made a trip to Jane's Foods, a proper India supermarket, to stock on authentic ingredients.  
My recipes are loosely based on Madhur Jaffrey's (dahl), Keith Floyd (tandoori chicken) & Gordon Ramsay (fruit salad) with my own additions/amendments.  The pakora recipe was a mix of the one from the back of the gram flour packet & this great blog. Mr Maker is the bread expert in our house so he made the Naan.


Menu
Aubergine pakora with cucumber raita
Tandoori chicken
Dahl
tomato salad
Naan
Spiced fruit salad


Aubergine Pakora


2 cups of finely chopped aubergine (can use any veg)
2 small red onions chopped
2 green chillies chopped (more if you want them hotter)
3 cups of gram flour
approx 1 1/2 cups of water
handful of chopped curry leaves
Pinch of salt
1 tsp turmeric
1 tsp chilli powder
1 tsp gram masala


Mix the dry ingredients in a bowl.  Stir in the onion and aubergine.  Gradually add the water to the flour mixture until a stiff batter forms.  You may not need all of the water.  Leave for 30 mins.
Heat oil (I used peanut oil) to just smoking point. We shallow fried so had about 3" depth of oil. Drop about a tablespoon of mixture into the oil and turn frequently until golden on all sides. Drain on paper towel. 


Tandoori chicken


4/5lb chicken jointed into 8 pieces
juice of 2 lemons
2 tsp chilli powder
2 tsp ground cumin
4 cloves of garlic minced
4cm ginger minced
1 tsp paprika
2 cups of natural yoghurt


Mix lemon juice & chilli powder and rub all over chicken pieces.  Leave for 30 mins.
Mix all other ingredients together and smear over the chicken.  Allow to marinade in the fridge overnight (min. 4 hours).
Pre heat grill then cook chicken over indirect heat until internal temperature reaches 90oC and the chicken is nicely charred. Sorry for rather vague cooking instructions, its the look & poke approach.


Dahl


1 1/2 cups of yellow split peas
5 cups water
1 tsp turmeric
4 slices of ginger, no need to peel
1 tsp salt
1 tsp garam masala
1 tbs peanut oil
2 tsp cumin 
2 cloves of garlic sliced
1 tsp chilli powder


Bring water & yellow split peas to the boil.  Remove scum with slotted spoon.  Add ginger and turmeric.  Cover, leaving the lid slightly adjar & simmer for about 1 1/2hrs.  Stir in the last half hour to prevent sticking. You may need to add more water.  Add salt & garam.
In a seperate pan heat oil. Add cumin until it becomes fragrant then add garlic until it browns. Remove from heat & add chilli.  Pour over dahl and mix.


Spiced Fruit Salad


100g granulate sugar
150ml water
3 black peppercorns
1 small cinnamon stick
5 cardamom pods lightly crushed
1 papaya
1 mango
1 pineapple
2 kiwis


Put the sugar & water into a pan over a medium heat. Stir until the sugar dissolves. Add the spices and boil briefly.  Reduce heat and simmer until it thickens slightly (about 10 mins). Set aside to cool & infuse further.
Peel & slice the fruit into a large bowl. Pour over the syrup and serve.


All recipes served 6 with no left overs!  Thanks to Kim for being my photographer