Showing posts with label thrift. Show all posts

Friday, September 25, 2015

Cafetiere cosy

I had a few girlfriends round for coffee on Monday so the Daddy cafetiere was deployed but as we were busy chatting our coffee was busy cooling. Yuck to luke warm coffee.  I rather un-stylishly wrapped a tea towel round the pot and made a note to get on with making a cosy for the cafetiere.

I found this great tutorial on Stumbles & Stitches blog and essentially followed her ideas.

First up you need to measure you cafetiere to determine the size of the cosy.  Measure the diameter of your cafetiere - 1", then the height from bottom of spout to base of cafetiere + 1".  This will give you the larger of the two rectangles, mine was 13 1/2" x 6 1/2".  The second smaller rectangle will make up the fastener that goes between the handle. So measure the height between the handle & use a standard length of 5".  My smaller rectangle was 5" x 4".

I chose to use scraps for the outside of the cosy as I have a bazillion and I love this particular fabric (Kokka Echino London fabric) as its a great colour and a slightly heavy weight linen which is suitable for this project.


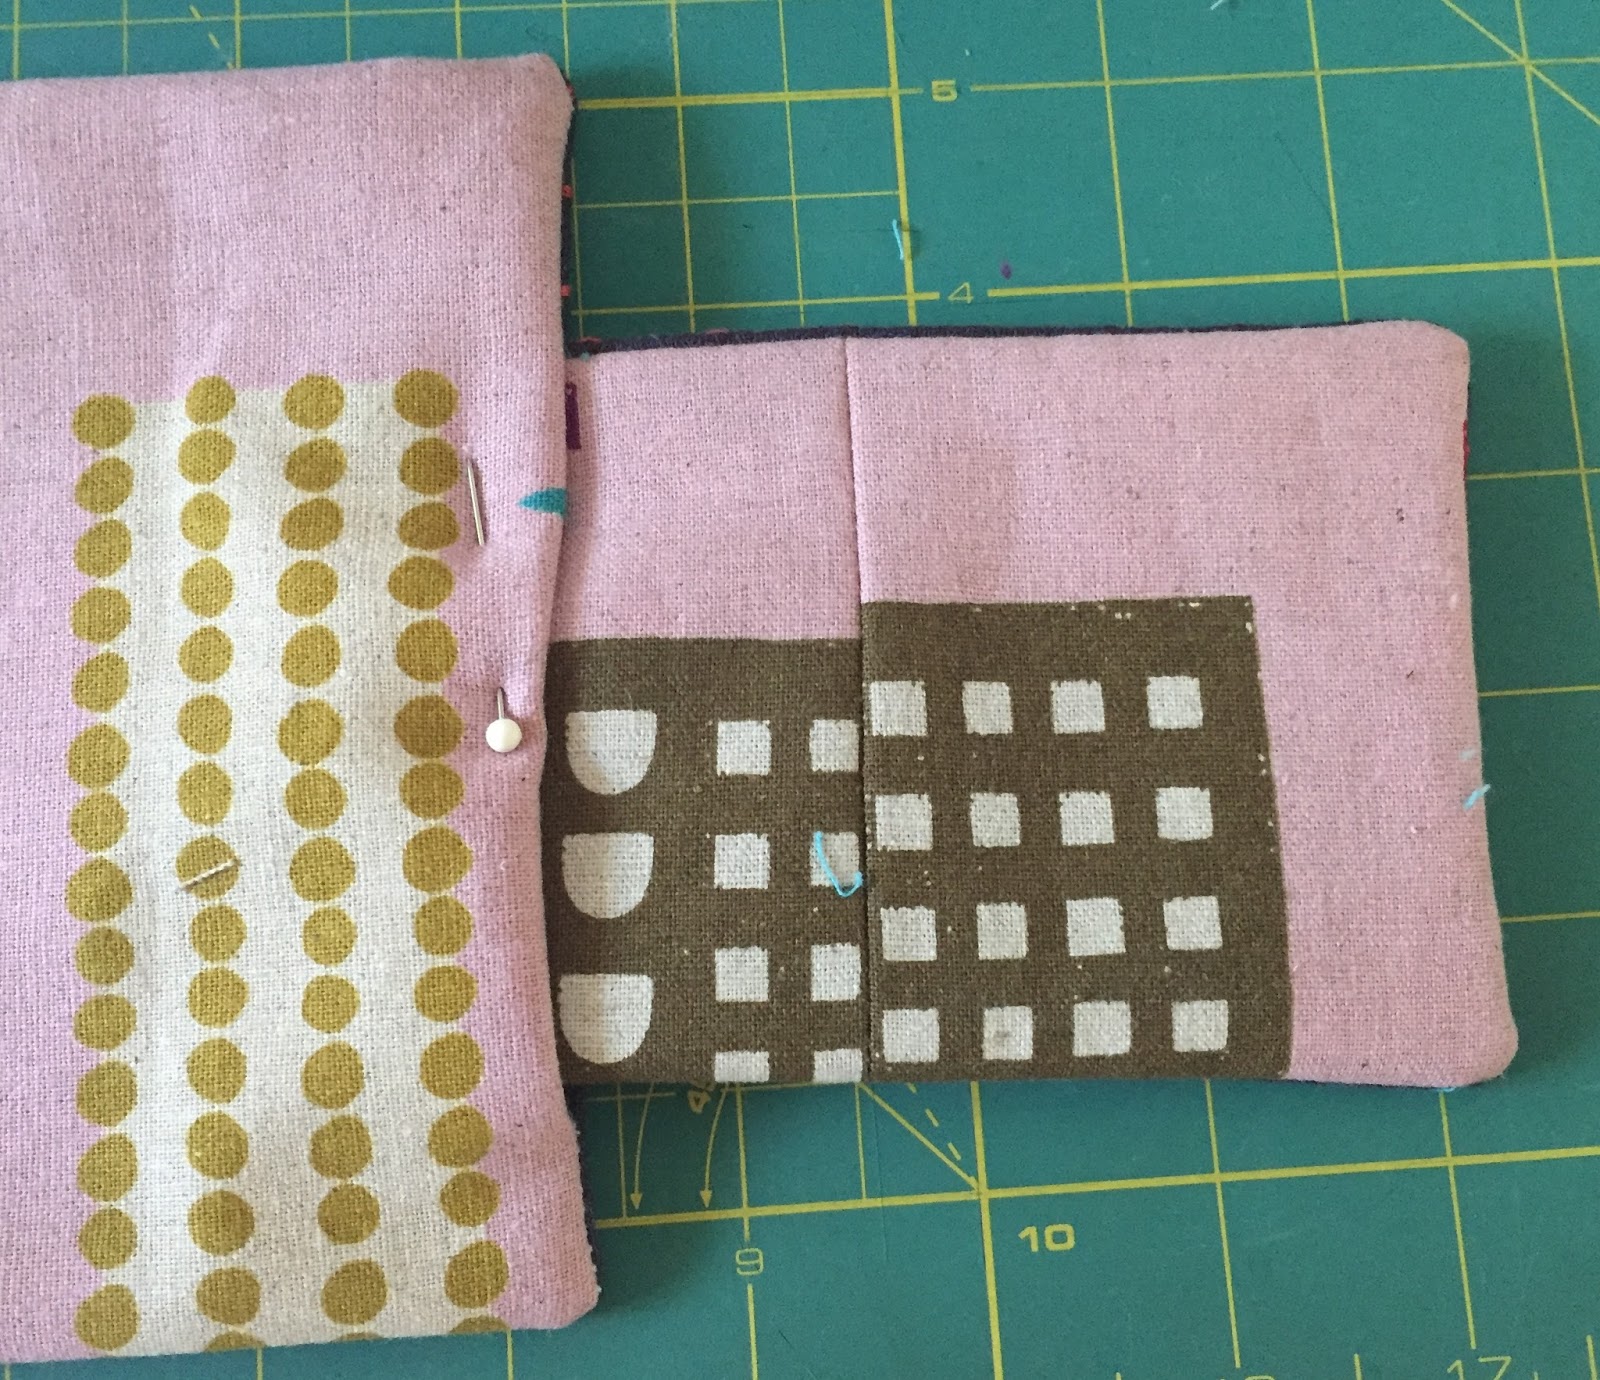
Sew the scraps together to the required size then press the seams open.  Trim to the size of the larger rectangle.  Lay this over a piece of quilt batting (or fleece) and join the two by stitching either side of the seams.

Pin before stitching batting to outside fabric
Next attach a piece of Velcro to the fabric on the outside of the cosy about 1/2" in from the edge & in the middle.


Pin the batting layer to your second fabric which will be on the inside of the cosy, right sides together. Sew together leaving a gap for the smaller rectangle to fit in. This will be the opposite end to the Velcro end.

Stitch the smaller rectangle together as you did the larger one (with out the quilting stage).  


Poke the smaller rectangle into the larger one and stitch all the way round the larger one to attach it and finish the cosy.


 You are done! One finished cafetiere cosy!


 Such an easy and fun project, I'm thinking of knocking a few up for Christmas gifts.

Friday, August 22, 2014

Leather and cork coasters

In my previous life (living in UK) I didn't have coasters, I would have balked at the idea of even owning one.  Possibly due to the 'granny' image or the fact my sitting room was so small we didn't have a coffee table, and therefore no need for a coaster.

Another country and a new perspective; coasters are in my good books.  

Esme & I made these ones a while ago.  One got eaten (seriously) by a friends little boy and one recently got ripped. Cork is great for coasters but these weren't quite durable enough.

Using leather leftover from having a pair of chairs recovered I've made a new batch. More durable and rather more sexy don't you think?!


First up cut out squares of cork and leather (you can get scrap bags of leather from craft stores which would be perfect for this) using an X-acto knife . Mine are 4" x 4".


Glue the cork and leather squares together using a good quality glue.  Don't worry if the squares don't 100% match up, you can trim them up when the glue has dried.


Using masking tape mark out your pattern. I went for geometric, my current love is anything geometric...


A great little craft project which takes no time (hour or so) and uses readily available supplies.  

Any suggestions what to do with the rest of the leftover leather?

Thursday, October 3, 2013

Geometric mobile

In the summer I went to the Renegade Craft Fair in LA.  Many of the vendors were big Instagrammers and I started following several of them. I love it; now I get to steal see great ideas from what super crafty people are up to.  One of those people was Robert Mahar.  He also posts YouTube videos on how to execute his projects; gotta love that sharing!

My take on Robert's geometric mobile
I knew I wanted 'something' to fill the space but couldn't seem to settle on anything. Then I saw this great geometric hanging pendant (see image below) and it got the cogs turning...Unfortunately not quite turning enough for me to be able to replicate but enough to decide on something geometric and hanging.

Image: via ahouseinthehills.com
So I plumped for Robert's mobile, a take on a traditional mobile from Finland.  The supply list is minimal - coffee stirrers & craft thread. 


Don't you just love the neon stirrers?! I won't go through the process as its done so well on Robert's YouTube clip, and it really is very easy.

First basic shape

Mobile taking shape


What to do with the other 900 coffee stirrers?! I am thinking mini ones as Christmas tree decorations.  Any other suggestions?

I also think the wall is still a little bare, further thought required on that one...


Friday, July 5, 2013

Double duty Ikea hack

Double duty table - Ikea hack
The DIY train is rolling again. I am moving my sewing 'stuff' from the sitting room into the spare bedroom. The room is used when we have visitors from the UK (more often than not with our large family!) which adds up to a few months a year.  It seemed logical to give the room another function. 

I wanted a table that could sit at the end of the bed and be useful for guests then modified to become a sewing table and/or desk when life returns to normal.  Introducing the Vika Kaj from Ikea. The lower leg height is perfect to sit at the end of the bed and then it can be raised for sewing/crafting/office needs.  Double bonus I found a table with these legs on Craigslist in Redlands.  Not so pretty is she?


I paid $50 for it, not cheap for a Craigslist find (but cheaper than new).  The black laminate wasn't going to stay so it required a mini make over. Due to the hefty price I delved into the burgeoning paint stores in our garage to refinish her.  After looking at this blog post from Yellow Brick Home (link in name) on how to cover laminate I felt confident of  the transformation (and decided to adopted their two tone idea).  I used a sample pot of Behr paint color matched to BM Elephant Gray on the side of the table, bog standard white eggshell for the top & Rustoleum Lagoon spray paint for the legs (left over from painting a filing cabinet which is now the bedside table in this room).  All covered with 3 or 4 coats of poly finish.


With the legs at the lowest it fits at the end of the bed. Then all you do is turn them to raise the height of the table, very useful in my mind :)

An easy transformation; not technically a hack, more of a repaint. Definitely a double duty table.

Happy weekend folks!


Tuesday, July 2, 2013

Thrifty & Craiglisty finds

I had the good fortune to find myself at the Long Beach Antique Market this Sunday, and what a Flea Market it is! Predictably massive & jam packed full of flea like treasures. In my opinion it is better than the Rose Bowl Flea Market; not quite some many staged stalls & more you can have a good rummage through.

Only coming away with 3 items and my pocket a mere 35 dollars lighter ensures a visit again very soon (weather permitting).


This little guy fixed his steely glare on me & I couldn't leave him behind.


My next acquisition was a set of pool balls for the princely sum of $15. I'm dead chuffed with these as I've been on the look out for ages.   I saw many at the Rose Bowl for $6 a ball, tusk.  Just need to get a glass jar big enough to display my shiny coloured balls...


The final item purchased was this; I'm not 100% sure what it is but AstroRay one side & turquoise target spaceship the other - whats not to love?! It has been added to my plate collection on the kitchen wall.

With leftover cash burning a hole in my purse I called Ed, a Craigslister who had a number of items I was watching. I arranged to meet him at a local lock up. Lock up, mid afternoon, dubious sounding slightly out of it unknown guy...I felt a teensy bit uneasy. Quick text to Mr with the address just in case we weren't home when he got back that evening... Rest assured Ed was a good guy, just not very many teeth (3 I think) but whoaa what a lock up! It was crammed with goodies. Mainly of the old tool variety which is what I had gone for.  I wish I could have spent the afternoon there....
 
   
Aren't these pliers great? (OK just me then).  I think they look kind of prehistoric & the middle one is definitely a relation of the steely eyed parrot.  I plan to hang them on the wall in our new TV room. No idea quite how yet...


Just look at the markings on that one!!! OK - I am sounding weird now (Ed thought I was some tool aficionado! ha!)


 A battered red chest which I hope will be home to our board games etc. when I can find the right place for it.


Any idea what these are? Clue - back on the tool theme...Yup vintage tape measures. Now, I really do love these. My poor quality photo doesn't do them justice.  Behind them is my final purchase from out of the lock up - a percussion drum box thing.  Sounds & looks lovely. I couldn't resist.

Purse another $35 lighter and me incomparably happier. 
 

Here they are in their new home.

What do you have collections of? Some else got any old tools?!

Tuesday, April 16, 2013

Thrifty scores and Johnathan Adler

I do love all of Johnathan Adler's pieces especially his ceramics. In my teenage years and early twenties I went through a pottery phase so I am drawn to beautiful ceramics (how Adler first started out) of which he has an alluring collection.  However there is some thing about the scale of production and the vast range he now has that I find slightly off putting. And what's with the drug references; stash boxes & 'shrooms ?! Come on, drugs are not cool. And I haven't even mentioned the prices.....

Nonetheless I am citing Johnathan Adler as inspiration for my recent thrift scores.

Jonathan Adler charade studded taper vase $88
Alice Crick salt n' pepper vases $3
Honestly I would choose JA's vase over mine but these little salt and pepper shakers are super cute and great for displaying single stems.

Jonathan Adler two tier table $795.00

Alice Crick single tier table $14.99
I was stoked to find this gem.  It was a bit of a frivolous purchase as we don't really need another table (don't tell Mr M but I currently have 4 'spare' tables which I've thrifted needing varying degrees of attention) but you know what its like, one can't pass up a good deal!  It needs a bit of TLC - a sand down and respray and switch out of the 70's smoked glass for clear and bam she'll be good to go.  I might be able to find a home for her then...  
This purchase has spurred me on to start on the next room in our home - the sitting room.

Have you had any good thrift scores this week? Are you a Jonathan Adler fan?


Monday, October 29, 2012

Symmetry in night stands

I am feeling a tiniest bit guilty as we have started our bathroom remodel and here I am sat at the computer. In my defense I have done a dump run (What an experience; US dumps are MEGA in comparison to our little UK ones!), cleared up after my husbands demo yesterday & attempted to get the vinyl floor tiles up. If I take a closer look my guilt may be because I gave up a little too quickly on those floor tiles...

Anyway back to the safety of completed projects.


Matching nightstands seem to appeal to the slight OCD in me, I like the symmetry.  This is the first time we've matched on both sides of the bed; my previous bedside table is one my Grandpop made (he was a carpenter) in the 50's so I was loathed to replace it.  However my husbands was not so pretty, nor did it hold such sentimental value - he picked it out of the dump (literally) about 5 years ago. Of course we still have Grandpop's table but the dump find has returned to its humble beginnings.

This pair of nightstands were a Craigslist find for $25. I picked them up on the way home from dropping my daughter at playschool, I think she would have given them to me for free she was that desperate to get rid of them.  They are really quite sturdy, more so than Ikea, & cost a lot less too. Gotta love Craigslist!


They required a heavy sand down and 2 coats of primer before I started painting.  I used paint I had; white used for trim & the grey is from my daughters desk.  The handles were also 'free' from Home Depot as I had a rebate card from some paint offer.  


What you have beside your bed says a lot about you. Me - book (Barbara Kingslover: Prodigal Summer), InStyle & The  Week magazines, a picture from India, heart made by my niece & nephew, Bliss hand cream (the best) & alarm clock. My husband - Bike Snob book, Wired magazine & Bird clock.  He is a bike loving, techie twitcher.

Does your bedside table reflect you?!  

Back to those floor tiles...

Friday, October 26, 2012

Cheap as chips curtain rod

The sun comes blazing into our bedroom window most of the day which I am just starting to appreciate as autumn has finally arrived here in Southern California.  Consequently we knew we would need a pretty heavy duty shade, to keep out the heat as well as the light.  After trawling the internet blinds.com came out the cheapest. I chose a cellular black out shade in white, and as the window is 94" wide, its quite a piece of kit.  So I decided to go for curtains as well to soften the window a little and give a splash of colour to the room.

After a rather pricey blind I was looking to save a bit of cash on the curtains & curtain rod - no easy thing with an 94" wide window. Fortunately this post at Houseofhepworths.com explains how to make a cheap curtain rod - result!

Curtain rod ingredients

10ft electrical conduit pipe (Home Depot) - $3
can of spray paint (Walmart is cheapest) - $3.79
wall brackets x2 (Betydlig Ikea) - $3
end finials x2 (Vasentlig Ikea) - $5
Curtain rings (Syrlig Ikea) x2 - $8

Cut pipe to desired length (the kind chaps at Home Depot will even do this for you).  Spray paint it desired colour, I went for white. Fix brackets to the wall. To achieve a faux pinch pleat attach the curtain hooks to inside of the curtain about an inch or so below the top.


Thread onto the pole leaving one ring on the outside of the bracket.


Attaching the finials to the end of the rod could not be easier. Lo and behold a wine cork is exactly the right diameter! I knew there was a good reason I drank lots of wine!  Screw your chosen finial into the cork then cork your rod, as the saying goes..


Once again apologies for poor iPhone pictures.


And here are the finished hanging curtains with my cheap-as-chips-curtain-rod.   You honestly wouldn't know, I would highly recommend doing this if you need a longer curtain rod. As for the curtains they cost a total of $34; $20 for the fabric from Ikea and $14 for a king sheet (from Walmart) which I cut in half. 

$57 for curtains & curtain rod is my kinda of DIY project.  The master bedroom is now finished. Post to follow shortly...