Tuesday, January 21, 2014

DIY kitchen makeover part 1 - Billy becomes built ins


Redoing a kitchen can be a pricey affair.  After doing rough costings for completely replacing cabinets, changing door fronts verses painting with a few new inserts it was a no brainer to go for the painting option.  Even with an Ikea kitchen as the replacement it was considerably more expensive.  Our cabinets were a non offensive style with not too much chintz about them and the doors were in reasonably good shape, good enough to take paint.


The counter tops had been replaced by the previous owners so they didn't need changing. Although the granite would not be my choice its practical and still desirable in our area (gotta think about that resale value!).  

We switch the function of the rooms when we moved in; the previous owners had the space adjacent to the kitchen as a TV/family room and then the dining area through and arch way in the kitchen which was effectively part of the sitting room. We now have a large eat in kitchen/dining area and a TV room off the more formal sitting room. For us it seemed logical as we spend most of our time in the kitchen area.

Saturday morning craft activities
It made sense to tackle the dining end of the room first; the built ins along the end wall could store kitchen items whilst I painted the kitchen cabinets.  There are 4 Billy bookshelves with plain flat trim in between. 


Spacing out the cabinets

I choose the slightly deeper 15" cabinets as its a long room. We decided on 4 as that was the best fit for the space.  The tricky bit was attaching trim to the top and making it appear seamless with the doors which we wanted at either end.

Door on left with replica trim on center cabinet

Trim surrounding cabinets
After caulking, filling and painting the joins are now seamless(ish).  I did an extensive online search to determine the best paint to match Ikea white, apparently its Valspar Dove White.  Its pretty good, not exact. If you want an exact match I would recommend taking a shelf into HD or Lowes and getting them to color match it.  NB. the trim we used came already primed, winner!

We are so pleased with the end result. They are Tardis like in the amount they can store. So much so I need to get thrifting to fill a few empty gaps.


The handy husband installed recessed spot lights and a new fan, we opted for the same one as we have in the bedroom from Minka Aire.

Finished trim


If you are considering adding a 'Billy built in' I would strongly recommend getting the doors. We opted for the full length doors with glass inserts (link here).  You can hide even more junk behind them; one side we have the router and all those nasty cables hidden & the other the girls craft/coloring supplies.


It is a night and day transformation. It is now a light, bright and modern functional space.  What a relief to get rid of that hideous yellow! So here is the before and after. You can just see we also squared off the arch into the hallway.

Before

After
 Yes you can spy tools still lying about!  There are always snags to complete (trim around new sliding door).

If you want details on how to convert the bookshelves or any other info get in touch.  

Part 2 of the kitchen makeover to follow soon...


Thursday, January 16, 2014

Embroidery for babies

Perhaps the title is a little misleading. I don't actually mean embroidery for babies but embroidery for babies. Get it?

One of my best friends at home (UK) had twins before Christmas; a boy & girl.  I've been rather slow getting round to making them a gift what with Christmas, sickness (yup we had the lurgy for Christmas too) and a family ski trip all happening straight after their arrival into the world. Anyhow that's my excuse....


Nicola (of a Pip and a Peach fame) introduced me to embroidery. She gave me this pattern last year when she came to visit; the fruits of which now hang in my youngest daughter's bedroom. I thought I could utilise the same pattern for the twins as it had a boy & girl version.

Embroidery is a great sewing skill to add to your repertoire.  Its gratifyingly easy and you get results fast.  There are many super cute designs out there, Etsy is a great source in case you are looking.  There are many ways to get the image onto the fabric, this YouTube video explains them well.  I just traced mine through the fabric.


Did I forget to do her legs???!

I added a back to these two as they are a gift. Gather in the edges of the fabric by pulling together with a running stitch then secure with a knot. I then hot glued the backing fabric to the other fabric.  You could also sew the two pieces of fabric together.


Welcome little babies :-) xx


Thursday, December 12, 2013

Wooden Christmas Trees

The American ways are slowly creeping into my being. One of which is to decorate every surface in every room at 'holiday' time.  I love Christmas and am so excited we will be in our own home this year; so its not been hard to embrace this tradition.   


Hello to my forest of wooden Christmas trees! Aren't they cute?!  

I started with a strip of balsa wood (3/32"x 4"x 36") which you can get from craft stores for a couple of bucks.


Using a craft knife & ruler cut out 2 triangles of equal size. My largest was 6" tall and the width of the wood which was 4". Find the centre line of the triangle. The first tree I drew this on but after that I did it by eye which was easy when you use a cutting mat.  Then cut a notch a few millimeters wide from the top of the triangle to the centre point on your middle line.  Then repeat from the bottom up.   


Now slot the triangle together to make a Christmas tree!


You can use the off cuts to make up smaller trees.  I used up the strip of balsa wood and it gave me 7 trees.


The forest took less than an hour to make and cost only a few dollars.  And its great therapy to stop, sit down and make something at this busy time of year. Well it is for me anyway :-)

Happy Christmas!


Sorry girls, no inflatable Santa on the front lawn. You have to draw a line at some  point.

Tuesday, October 15, 2013

Cheddar Crackers

There are a lot of similarities with my no starch diet and a Paleo diet. The bonus being there are zillions of great Paleo blogs posting delicious recipes.  However a major difference is I am a happy eater of dairy and sugar; gotta have it! I stumbled upon another relevant diet, the Specific Carbohydrate Diet.  This diet is specifically starch, sugar, grain & complex carbohydrate free. Perfect for me! (I can do with out sugar now and then). I am not nearly as strict as the diet dictates, but as with everything I believe you have to find your own level.

I have bought this fantastic cookbook which adheres to the SCD. 


The cheddar crackers were the first recipe I tried from the book. They are amazing. Buttery, crisp, cheesy & big bonus do not taste of almond flour.


Cheddar Crackers

This recipe is slightly adapted from Healing Foods by Sandra Ramacher

1 cup almond flour
1 cup of grated sharp cheddar
1/2 tsp baking soda
1 tsp smoked paprika
black pepper
3 tbs cold water

Mix the dry ingredients together in a bowl. Gradually add the water until the mixture comes together to form a dough. It may be a little more or less than 3 tbs of water. Cover the dough and pop it in the fridge for 30 mins or more.

Preheat the oven to 300F.  Line a baking tray with parchment paper or a silicone mat. Roll the dough into small balls then flatten with the heal of your hand. Leave a gap between each cracker as they will spread a little.  The size of your crackers depends on how many you will make - I think I got just over a dozen from this amount of mixture.


Bake in the oven for about 15 mins, or when they just begin to brown at the edges. Then remove them from the oven and allow them to cool a little (about 5 minutes or so). Meanwhile turn the oven down to 210F.  Gently flip the crackers over then put the tray back in the oven for 30 minutes.  After the crackers have baked for 30 minutes turn the oven off and allow them to cool in the oven.  When the oven has cooled down remove the crackers and transfer to a wire rack to completely cool.

Store them in an airtight container between kitchen paper.  I kept mine in the fridge.


Despite my efforts to keep them to myself, they are a family favourite.  I am sure you could vary the recipe with whatever cheese you have to hand (providing its got a bold flavour). Or add dried herbs a la the the original recipe. 

Enjoy! 

x


Wednesday, October 9, 2013

The easiest fruit cake - starch and gluten free

This recipe is adapted from Pauline's fruit cake recipe. Pauline is my sisters step grandmother in law. Sis and I have done this recipe a million times (in the starch format) even as our Christmas cake for several years; its that good.  Its so quick and easy, beautifully moist and a great filler upper, a major plus in my book.  The original recipe adapted very easily to a starch free version with no compromise on taste or texture.

It is also a very forgiving recipe. You can vary the quantities/types of dried fruit and nuts with good results.


Pauline's fruit cake

600g mixed dried fruit of your choice
100g nut pieces of your choice
50g desiccated coconut, unsweetened 
3oz of liquid (sometimes I use brandy, orange juice or just water)
1 1/3 cup of almond flour (ground almonds)
1 egg beaten
1 tin of condensed milk
generous shake of mixed spice (cinnamon & ginger)
2 tsp baking soda

Preheat the oven to 320F (160C). Grease and line your preferred tin, usually 2 loaf tins for me.
Simmer the fruit in your chosen liquid for a few minutes, or until the fruit absorbs the liquid a little.  Transfer to a large bowl.  Add all the other ingredients and stir thoroughly to combine.  Spread evenly into the tin and bake until a tooth pick comes out clean. I tend to check it after about 45 minutes as it may need covering, and leave it in for another 10 mins or so.


A mighty fine looking cake in my book... 


Sunday, October 6, 2013

New baby gift - Owls in a tree

I love making gifts for new babies, fortunately I have friends who are still having babies!  This time around I went for a new idea, owls in a tree. I decided to personalize the gift (like this one) and luckily her name has only 3 letters.

The owls were made from fabric scraps and felt. I made a pattern then cut all the pieces out put them together, either sewing or gluing (felt pieces).  I put a few small bells inside so they can rattle in her little hands.


The 'tree' is an oatmeal container wrapped inside & out with felt. In my haste I forgot to do the inside first (hence not done in the pictures), I would suggest doing it first before sealing up the lid of the container. I used the lid as a template to cut out the hole and a permanent marker to draw the faux bois on the outside.


What new baby gifts do you make? Do you have a 'go to' one, or do you like to try new things?

Thursday, October 3, 2013

Geometric mobile

In the summer I went to the Renegade Craft Fair in LA.  Many of the vendors were big Instagrammers and I started following several of them. I love it; now I get to steal see great ideas from what super crafty people are up to.  One of those people was Robert Mahar.  He also posts YouTube videos on how to execute his projects; gotta love that sharing!

My take on Robert's geometric mobile
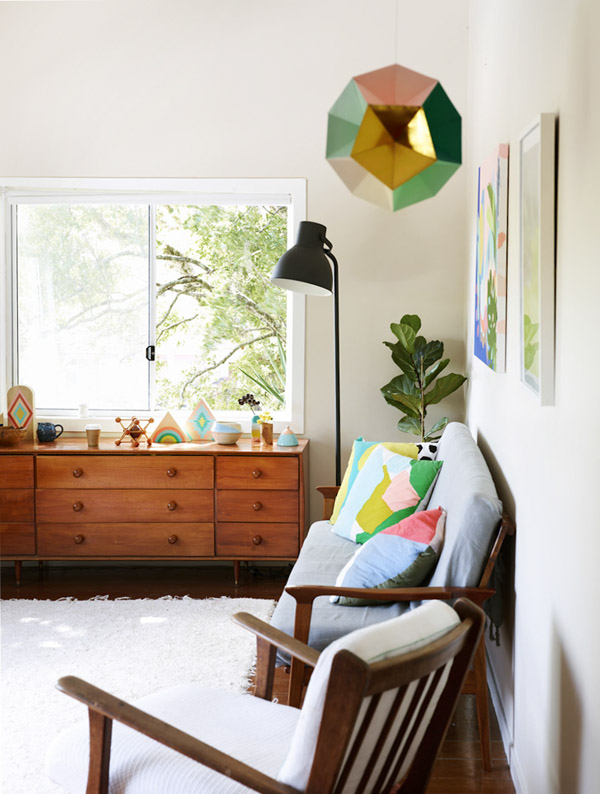
I knew I wanted 'something' to fill the space but couldn't seem to settle on anything. Then I saw this great geometric hanging pendant (see image below) and it got the cogs turning...Unfortunately not quite turning enough for me to be able to replicate but enough to decide on something geometric and hanging.

Image: via ahouseinthehills.com
So I plumped for Robert's mobile, a take on a traditional mobile from Finland.  The supply list is minimal - coffee stirrers & craft thread. 


Don't you just love the neon stirrers?! I won't go through the process as its done so well on Robert's YouTube clip, and it really is very easy.

First basic shape

Mobile taking shape


What to do with the other 900 coffee stirrers?! I am thinking mini ones as Christmas tree decorations.  Any other suggestions?

I also think the wall is still a little bare, further thought required on that one...